IOT devices, Point-of-Sale systems, application events or any client that sends data destined for indexing in Elasticsearch often need to send and forget, however, unless that data is of low value there needs to be assurance that arrives at its final destination. Back-pressure and database outages can pose a considerable threat to data integrity.
Background
High availability and high performance often mean burdensome complexity. Data replication, application, network and infrastructure redundancy, anything we can do to avoid a single point of failure. However, what happens when one of those points do fail? Alternatively, a cascade of problems causing slowdowns and back pressure builds to constant far too high for indexing to catch up?
Pub-Sub style message queues like Kafka are growing in popularity because they add incredible flexibility to data pipelines, yet these queues can also suffer from data loss and duplication unless you expend sufficient effort in expert tuning and configuration. Pub-Sub MQs can also over complicate the architecture depending on requirements. I found myself re-thinking some of my architectures after reading Why Messaging Queues Suck by Bob Reselman. I still use messaging queues but have pushed Pub-Sub further back from the edge of my stack.
Over the years I have made conscious efforts to move complexity further from the edge. The edge, being the API endpoints relied upon by clients. If I can simplify and harden the edges, then the more sensitive and complex systems deeper down have less exposure to unknowns. An early layer of simplicity not only buffers API calls and data but moves complexity back a rung.
Overview
In the process below I demonstrate a store and forward setup used for asynchronous data gathering. The clients need to send data, and I need assurance that data makes it to its destination. I don’t need the clients waiting for confirmation.

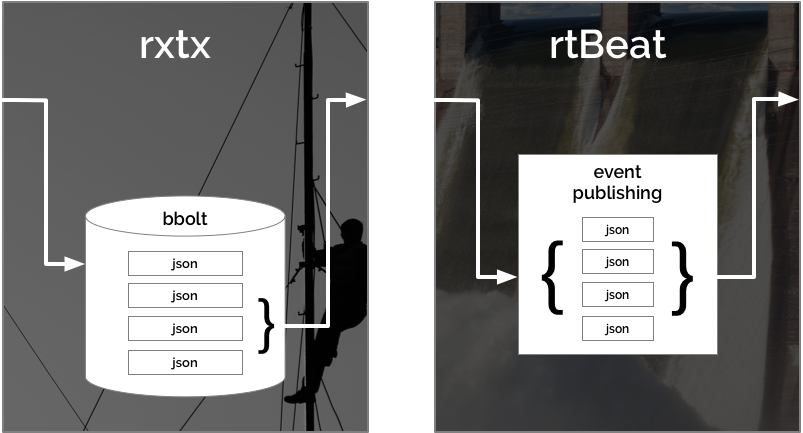
I use rxtx to store-and-forward data to rtBeat which publishes it into Elasticsearch. This process of store-and-forward achieved through a batching message queue that can function independently or as a first layer of buffering to larger message queue applications.
Using rxtx with rtBeat you can achieve high performance, highly available service for accepting JSON POST data and delivering it to Elasticsearch. rxtx collects post data, writes it to a local bbolt database and sends batches on an interval to rtBeat. rtBeat processes the batches of POSTed JSON data and publishes them as events into Elasticsearch. rtBeat is an Elastic beat and can publish simultaneously to elasticsearch, logstash, kafka and redis.
Development Environment
You need a Kubernetes cluster and an Elasticsearch database running in it. If you don’t have a Kubernetes cluster or would like to create a production-like cluster for development or research, I suggest the following articles:
the-project Namespace
In continuity with previous tutorials, I’ll stick with the-project namespace.
00-namespace.yml:
apiVersion: v1
kind: Namespace
metadata:
  name: the-project
  labels:
    env: dev
Create the namespace:
kubectl create -f 00-namespace.yml
The Project: Weather (wx) Data
In this tutorial, I use weather (wx) data from the Dark Sky API. Since the Dark Sky API is a service for pulling data, I use a Kubernetes cronjob to pull from the Dark Sky API and push into the new service, simulating an IOT based weather client in Los Angeles. Pull and send is a familiar pattern for many data retrieval systems.
rxtx for Store-and-Forward
rxtx is a queue based, store-and-forward data collector and data transmitter useful for online/offline data collection, back pressure buffering or general queuing. rxtx uses the highly efficient and fast bbolt maintained by CoreOs. bbolt stores message awaiting an interval and the ability to send them.
rxtx is written in Golang and originally designed to run in a Docker container on IOT devices with intermittent network connectivity. Because of its simplistic design and network tolerance, it can be a safety net during unexpected outages or slowdown deeper in the system.
rxtx listens for HTTP POST requests with JSON data, it stores the data along with a timestamp and sequence number, on a defined interval rxtx gathers a batch of JSON messages and in-turn POSTs them to a defined endpoint. rxtx can POST to any endpoint accepting POST data yet is designed to work specifically with rtBeat, which we implement further down.
wx-rxtx Service
Kubernetes Services are the communication hub for a microservices architecture. Services are, and so it makes sense to set them up early on.
Our wx-rxtx service look for Pods with the label app: wx-rxtx and direct traffic to them on port 80 to port 80 on the Pods.
wx-rxtx/20-service.yml:
apiVersion: v1
kind: Service
metadata:
  name: wx-rxtx
  namespace: the-project
  labels:
    app: wx-rxtx
    env: dev
spec:
  selector:
    app: wx-rxtx
  ports:
  - protocol: "TCP"
    port: 80
    targetPort: 80
  type: ClusterIP
Create the wx-rxtx service:
kubectl create -f wx-rxtx/20-service.yml
Although it won’t do much, at this point we do have a service listening at http://wx-rxtx:80/ from inside the cluster; however, from outside the-project namespace it would need to be addressed http://the-project.wx-rxtx:80/.
wx-rxtx StatefulSet
We use Kubernetes StatefulSets because unlike a Deployment, a StatefulSet maintains a sticky identity for each of their Pods. rxtx will use a PersistentVolume to store its bbolt database. If a Pod it restarted, or a Kubernetes node goes down, a new Pod eventually takes its place and attaches to the existing data.
I recommend running Ceph managed by rook. “Ceph is a unified, distributed storage system designed for excellent performance, reliability, and scalability.” and “Rook orchestrates battle-tested open-source storage technologies including Ceph.”
Configuring Ceph to replicate your data ensures that with rxtx every message is eventually sent, even with a catastrophic failure of multiple Kubernets nodes.
Setting up Ceph and rook is beyond the scope of this article, but quickly done with their excellent documentation.
wx-rxtx/40-statefulset.yml:
apiVersion: apps/v1
kind: StatefulSet
metadata:
  name: wx-rxtx
  namespace: the-project
  labels:
    app: wx-rxtx
    env: dev
spec:
  serviceName: wx-rxtx
  replicas: 1 # scale as desired
  selector:
    matchLabels:
      app: wx-rxtx
  template:
    metadata:
      labels:
        app: wx-rxtx
        env: dev
    spec:
      containers:
      - name: wx-rxtx
        image: txn2/rxtx:1.2.0
        imagePullPolicy: Always
        args: [
          "--ingest=http://wx-rtbeat:80/in",
          "--port=80",
          "--path=/data",
          "--interval=10", # seconds between intervals
          "--batch=4000",  # maximum batch size
          "--maxq=500000"] # maximum message to store
        volumeMounts:
        - name: wx-rxtx-data-volume
          mountPath: /data
        ports:
        - name: rxtx
          containerPort: 80
  volumeClaimTemplates:
  - metadata:
      name: wx-rxtx-data-volume
    spec:
      storageClassName: rook-block
      accessModes: [ ReadWriteOnce ]
      resources:
        requests:
          storage: 1Gi # enough to hold maxq
Create the wx-rxtx statefulset:
kubectl create -f wx-rxtx/40-statefulset.yml
The wx-rxtx service should now be able to find wx-rxtx Pods deployed by the StatefulSet and any data sent to the service http://wx-rxtx:80/ is send to them.
rtBeat to Collect, Buffer and Publish
rtBeat processes HTTP POST data from rxtx and publishes events into Elasticsearch, Logstash, Kafka, Redis or directly to log files.
rtBeat is designed to accept batches of JSON data from rxtx and publish these batches to Elasticsearch, Logstash, Kafka, and Redis. In this project, we are only publishing to elasticsearch. However, you can review the rtBeat configuration for these other systems.
wx-rtbeat Service
wx-rtbeat listens internally on the cluster at http://wx-rtbeat:80, we can set up ingress to point to this service in the future to allow external access.
wx-rtbeat/20-service.yml:
apiVersion: v1
kind: Service
metadata:
  name: wx-rtbeat
  namespace: the-project
  labels:
    app: wx-rtbeat
    env: dev
spec:
  type: ClusterIP
  selector:
    app: wx-rtbeat
  ports:
  - name: rtbeat
    protocol: TCP
    port: 80
    targetPort: 80
Create the wx-rtbeat Service:
kubectl create -f wx-rtbeat/20-service.yml
wx-rtbeat ConfigMap
A significant part of configuring rtbeat involves mapping fields. Although Elastic search does a great job of detecting data types, it’s best to be specific when you can. Since we are using data from the Dark Sky API, we can choose the most appropriate Elasticsearch data types.
The following ConfigMap mounts as a volume into the Pods running rtbeat.
Within the rtbeat.yml section under output.elasticsearch: you find hosts: set to “elasticsearch:9200”. The elasticsearch service running on port 9200 is setup in the tutorial Production Grade Elasticsearch on Kubernetes.
wx-rtbeat/30-configmap.yml:
apiVersion: v1
kind: ConfigMap
metadata:
  name: wx-rtbeat
  namespace: the-project
  labels:
    app: wx-rtbeat
    env: dev
data:
  rtbeat.yml: |-
    rtbeat:
      # beat configuration
      # see https://github.com/txn2/rtbeat/blob/master/rtbeat.reference.yml
      port: "80"
      timeout: 5
      name: wx-rtbeat

    output.elasticsearch:
      # Array of hosts to connect to.
      hosts: ["elasticsearch:9200"]
      # Elasticsearch Index (new index each month)
      index: "wx-rtbeat-%{+yyyy.MM}"

    setup:
      template.name: "wx-rtbeat"
      template.pattern: "wx-rtbeat-*"
      template.fields: "/config/fields.yml"
      template.overwrite: true

    #setup.kibana:
    #  protocol: "http"
    #  host: "kibana:80"
    #  ssl.enabled: false

    # internal metrics through a HTTP endpoint
    http.enabled: true
    http.port: 5066

  fields.yml: |-
    - key: rxtx
      title: rtbeat
      # Data sent in from rxtx will be in batches of rxtxMsg objects where
      # the payload will hold the original post data and will be prefixed as such,
      # model the data here for proper indexing into Elasticsearch.
      # see https://www.elastic.co/guide/en/elasticsearch/reference/6.3/mapping-types.html
      description: >
        “Powered by Dark Sky” - https://darksky.net/poweredby/
        The following fields are pulled from the Dark Sky API free tier allowing 1000 requests per day,
        see https://darksky.net/dev/docs for API documentation. The fields below only
        map to returned data excluding all but the "currently" key (exclude=minutely,hourly,daily,flags)
      fields:
      # rxtx standard fields (customizable)
      - name: rxtxMsg.seq
        required: true
        type: string
      - name: rxtxMsg.time
        required: true
        type: date
      - name: rxtxMsg.producer
        required: true
        type: keyword
      - name: rxtxMsg.label
        required: true
        type: keyword
      - name: rxtxMsg.key
        required: true
        type: keyword
      # custom
      - name: rxtxMsg.payload.latitude
        required: true
        type: half_float
      - name: rxtxMsg.payload.longitude
        required: true
        type: half_float
      - name: rxtxMsg.payload.timezone
        required: true
        type: keyword
      - name: rxtxMsg.payload.offset
        required: true
        type: byte
      - name: rxtxMsg.payload.currently.time
        required: true
        type: long
      - name: rxtxMsg.payload.currently.summary
        required: true
        type: keyword
      - name: rxtxMsg.payload.currently.icon
        required: true
        type: keyword
      - name: rxtxMsg.payload.currently.nearestStormDistance
        required: true
        type: integer
      - name: rxtxMsg.payload.currently.precipIntensity
        required: true
        type: half_float
      - name: rxtxMsg.payload.currently.precipIntensityError
        required: true
        type: half_float
      - name: rxtxMsg.payload.currently.precipProbability
        required: true
        type: half_float
      - name: rxtxMsg.payload.currently.precipType
        required: true
        type: keyword
      - name: rxtxMsg.payload.currently.temperature
        required: true
        type: half_float
      - name: rxtxMsg.payload.currently.apparentTemperature
        required: true
        type: half_float
      - name: rxtxMsg.payload.currently.dewPoint
        required: true
        type: half_float
      - name: rxtxMsg.payload.currently.humidity
        required: true
        type: half_float
      - name: rxtxMsg.payload.currently.pressure
        required: true
        type: half_float
      - name: rxtxMsg.payload.currently.windSpeed
        required: true
        type: half_float
      - name: rxtxMsg.payload.currently.windGust
        required: true
        type: half_float
      - name: rxtxMsg.payload.currently.windBearing
        required: true
        type: half_float
      - name: rxtxMsg.payload.currently.cloudCover
        required: true
        type: half_float
      - name: rxtxMsg.payload.currently.uvIndex
        required: true
        type: half_float
      - name: rxtxMsg.payload.currently.visibility
        required: true
        type: half_float
      - name: rxtxMsg.payload.currently.ozone
        required: true
        type: half_float

    - key: beat
      title: Beat
      description: >
        Contains common beat fields available in all event types.
      fields:
        - name: beat.name
          description: >
            The name of the Beat sending the log messages. If the Beat name is
            set in the configuration file, then that value is used. If it is not
            set, the hostname is used. To set the Beat name, use the `name`
            option in the configuration file.
        - name: beat.hostname
          description: >
            The hostname as returned by the operating system on which the Beat is running.
        - name: beat.version
          description: >
            The version of the beat that generated this event.

        - name: "@timestamp"
          type: date
          required: true
          format: date
          example: August 26th 2016, 12:35:53.332
          description: >
            The timestamp when the event log record was generated.

        - name: tags
          description: >
            Arbitrary tags that can be set per Beat and per transaction
            type.

        - name: fields
          type: object
          object_type: keyword
          description: >
            Contains user configurable fields.

        - name: error
          type: group
          description: >
            Error fields containing additional info in case of errors.
          fields:
            - name: message
              type: text
              description: >
                Error message.
            - name: code
              type: long
              description: >
                Error code.
            - name: type
              type: keyword
              description: >
                Error type.
Create the wx-rtbeat ConfigMap:
kubectl create -f wx-rtbeat/30-configmap.yml
wx-rtbeat Deployment
The deployment creates a Pod running the rtbeat Docker container configured by the ConfigMap we created above.
wx-rtbeat/40-depoloyment.yml:
apiVersion: apps/v1
kind: Deployment
metadata:
  name: wx-rtbeat
  namespace: the-project
  labels:
    app: wx-rtbeat
    env: dev
spec:
  replicas: 1
  selector:
    matchLabels:
      app: wx-rtbeat
  template:
    metadata:
      labels:
        app: wx-rtbeat
        env: dev
    spec:
      containers:
      - name: wx-rtbeat
        image: txn2/rtbeat:1.0.2
        imagePullPolicy: Always
        args: ["-e", "--path.config=/config"]
        volumeMounts:
        - name: wx-rtbeat-config-volume
          mountPath: /config
        ports:
        - name: rtbeat
          containerPort: 80
      volumes:
      - name: wx-rtbeat-config-volume
        configMap:
          name: wx-rtbeat
Create the wx-rtbeat Deployment:
kubectl create -f wx-rtbeat/40-deployment.yml
Client Simulation / Kubernetes Cron
We could add an ingress configuration and expose our wx-rtbeat service to the outside world, allowing IOT devices like weather stations, machine sensors, or anything that can POST JSON data to us. However, for this tutorial, we can more easily simulate a client using a Kubernetes CronJob.
We create a CronJob that issues a request to the Dark Sky API, receives JSON data and subsequently issues a POST directly to our rtbeat service.
I keep my Dark Sky API in a Secret and mount the value of the secret to an environment variable accessible in the container used by the cron.
- Sign up for a Dark Sky API developer account (free).
- Create a file called apikey with your secret API key in it.
Create the Kubernetes secret wx-data-api-key in the-project namespace:
kubectl create secret generic wx-data-api-key --from-file=apikey -n the-project
wx-data/40-cron.yml:
apiVersion: batch/v1beta1
kind: CronJob
metadata:
  name: wx-data
  namespace: the-project
  labels:
    app: wx-data
    env: dev
spec:
  schedule: "*/2 * * * *"
  concurrencyPolicy: Forbid
  startingDeadlineSeconds: 90
  jobTemplate:
    spec:
      template:
        spec:
          containers:
          - name: wx-data
            image: txn2/curl:v3.0.0
            env:
            - name: API_KEY
              valueFrom:
                secretKeyRef:
                  name: wx-data-api-key
                  key: apikey
            - name: DATA_FROM
              value: "https://api.darksky.net/forecast/$(API_KEY)/33.8148455,-117.826581?exclude=minutely,hourly,daily,flags"
            - name: DATA_TO
              value: "http://wx-rxtx:80/rx/cron/collector/wx-data"
            command: [
              "/bin/sh",
              "-c",
              "/usr/bin/curl -sX GET $(DATA_FROM) > data && /usr/bin/curl -sX POST -d @data $(DATA_TO)"
            ]
          restartPolicy: OnFailure
Create the wx-data CronJob:
kubectl create -f wx-data/40-cron.yml
Performance
Inserting one record every two minutes is only to demonstrate the process. I run this setup on a few production systems that handle around 200 messages per second and often up to 400 or 500 with only minimal resource used other than data storage.
Scaled rtBeat and rxtx by increasing the number of replicas to whatever your Kubernetes cluster can handle. rtBeat and rxtx services run independently allowing infinite horizontal scaling.
Conclusion
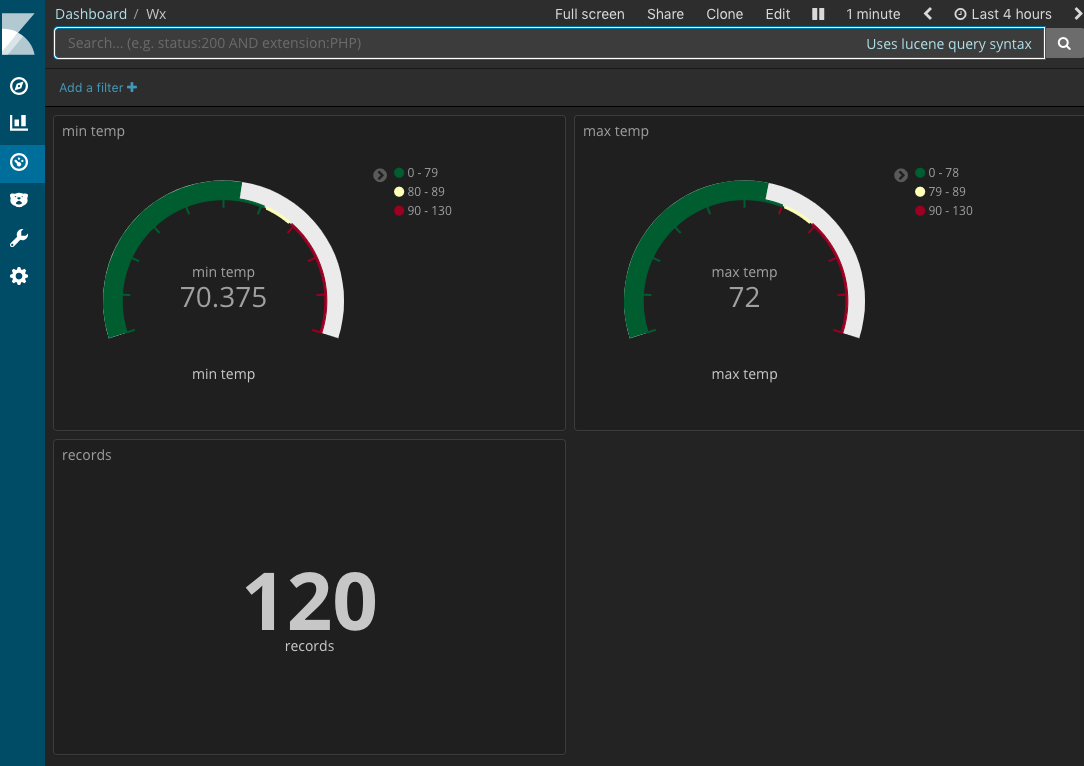
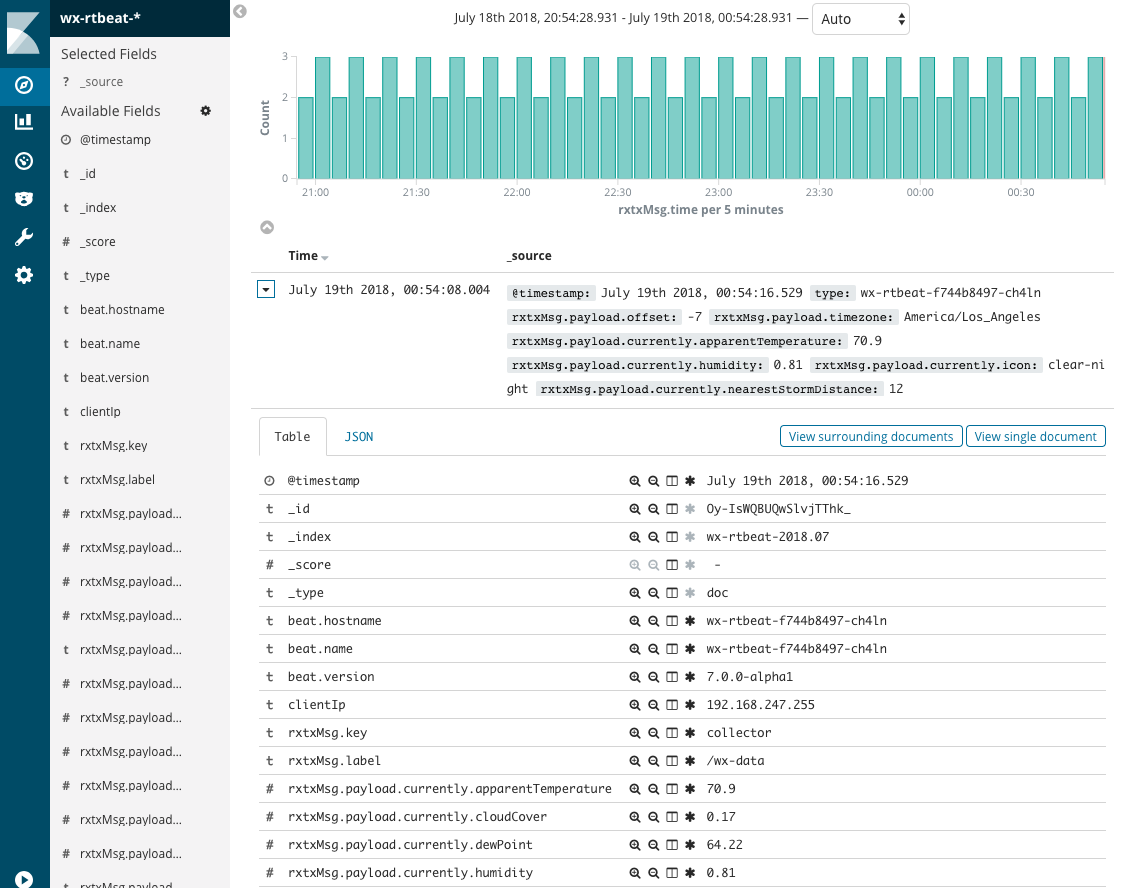
If you have setup Kibana on Kubernetes, you should begin to see data. You are now able to set up an index, explore your data and create visualizations.


Port Forwarding / Local Development
Check out kubefwd for a simple command line utility that bulk forwards services of one or more namespaces to your local workstation.
Reference
- Production Hobby Cluster
- rtBeat Docker container
- rxtx Docker container
- Elasticsearch
- Elastic beat
This blog post, titled: "High Traffic JSON Data into Elasticsearch on Kubernetes: Instant, reliable, send and forget." by Craig Johnston, is licensed under a Creative Commons Attribution 4.0 International License.


