kubefwd has been a stable and useful tool for my team and me for almost eight years. It solves a simple but persistent problem: developing applications locally that need to communicate with services running in Kubernetes. Rather than juggling multiple kubectl port-forward commands or maintaining environment-specific connection strings, kubefwd bulk-forwards services so they’re accessible by name, just like they would be inside the cluster.
After years of reliable service (aside from Windows /etc/hosts limitations and reconnection logic that are now resolved), I finally added features that people had been requesting: auto-reconnect, an interactive terminal UI, and a REST API for programmatic control. This article covers what’s new.
Getting Started
kubefwd is fully backwards compatible. If you’ve been using it the classic way, that still works:
# Classic mode - specify namespaces upfront
sudo -E kubefwd svc -n ns1,ns2
You can add the new features to classic mode with flags:
# Classic mode with TUI, API, and auto-reconnect
sudo -E kubefwd svc -n ns1,ns2 --tui --api -a
Idle Mode (New)
The new idle mode starts kubefwd without forwarding any services, letting you add them interactively or via API:
# Idle mode - API and auto-reconnect enabled by default
# Control via API or MCP only
sudo -E kubefwd

# Idle mode with TUI - full interactive control
sudo -E kubefwd --tui
Idle mode (no svc subcommand) enables the REST API and auto-reconnect by default. Add --tui for the interactive terminal interface.
From the TUI, you can:
- Select one or more namespaces to forward
- Browse and forward individual services (press
f) - Stop forwarding specific services
- Switch Kubernetes contexts (clusters)
- Add namespaces and services from multiple clusters simultaneously
No more specifying namespaces on the command line and restarting when you need to add more.
Interactive TUI Mode
The Terminal User Interface transforms kubefwd from a “set it and forget it” tool into an interactive development companion.
Idle Mode Startup
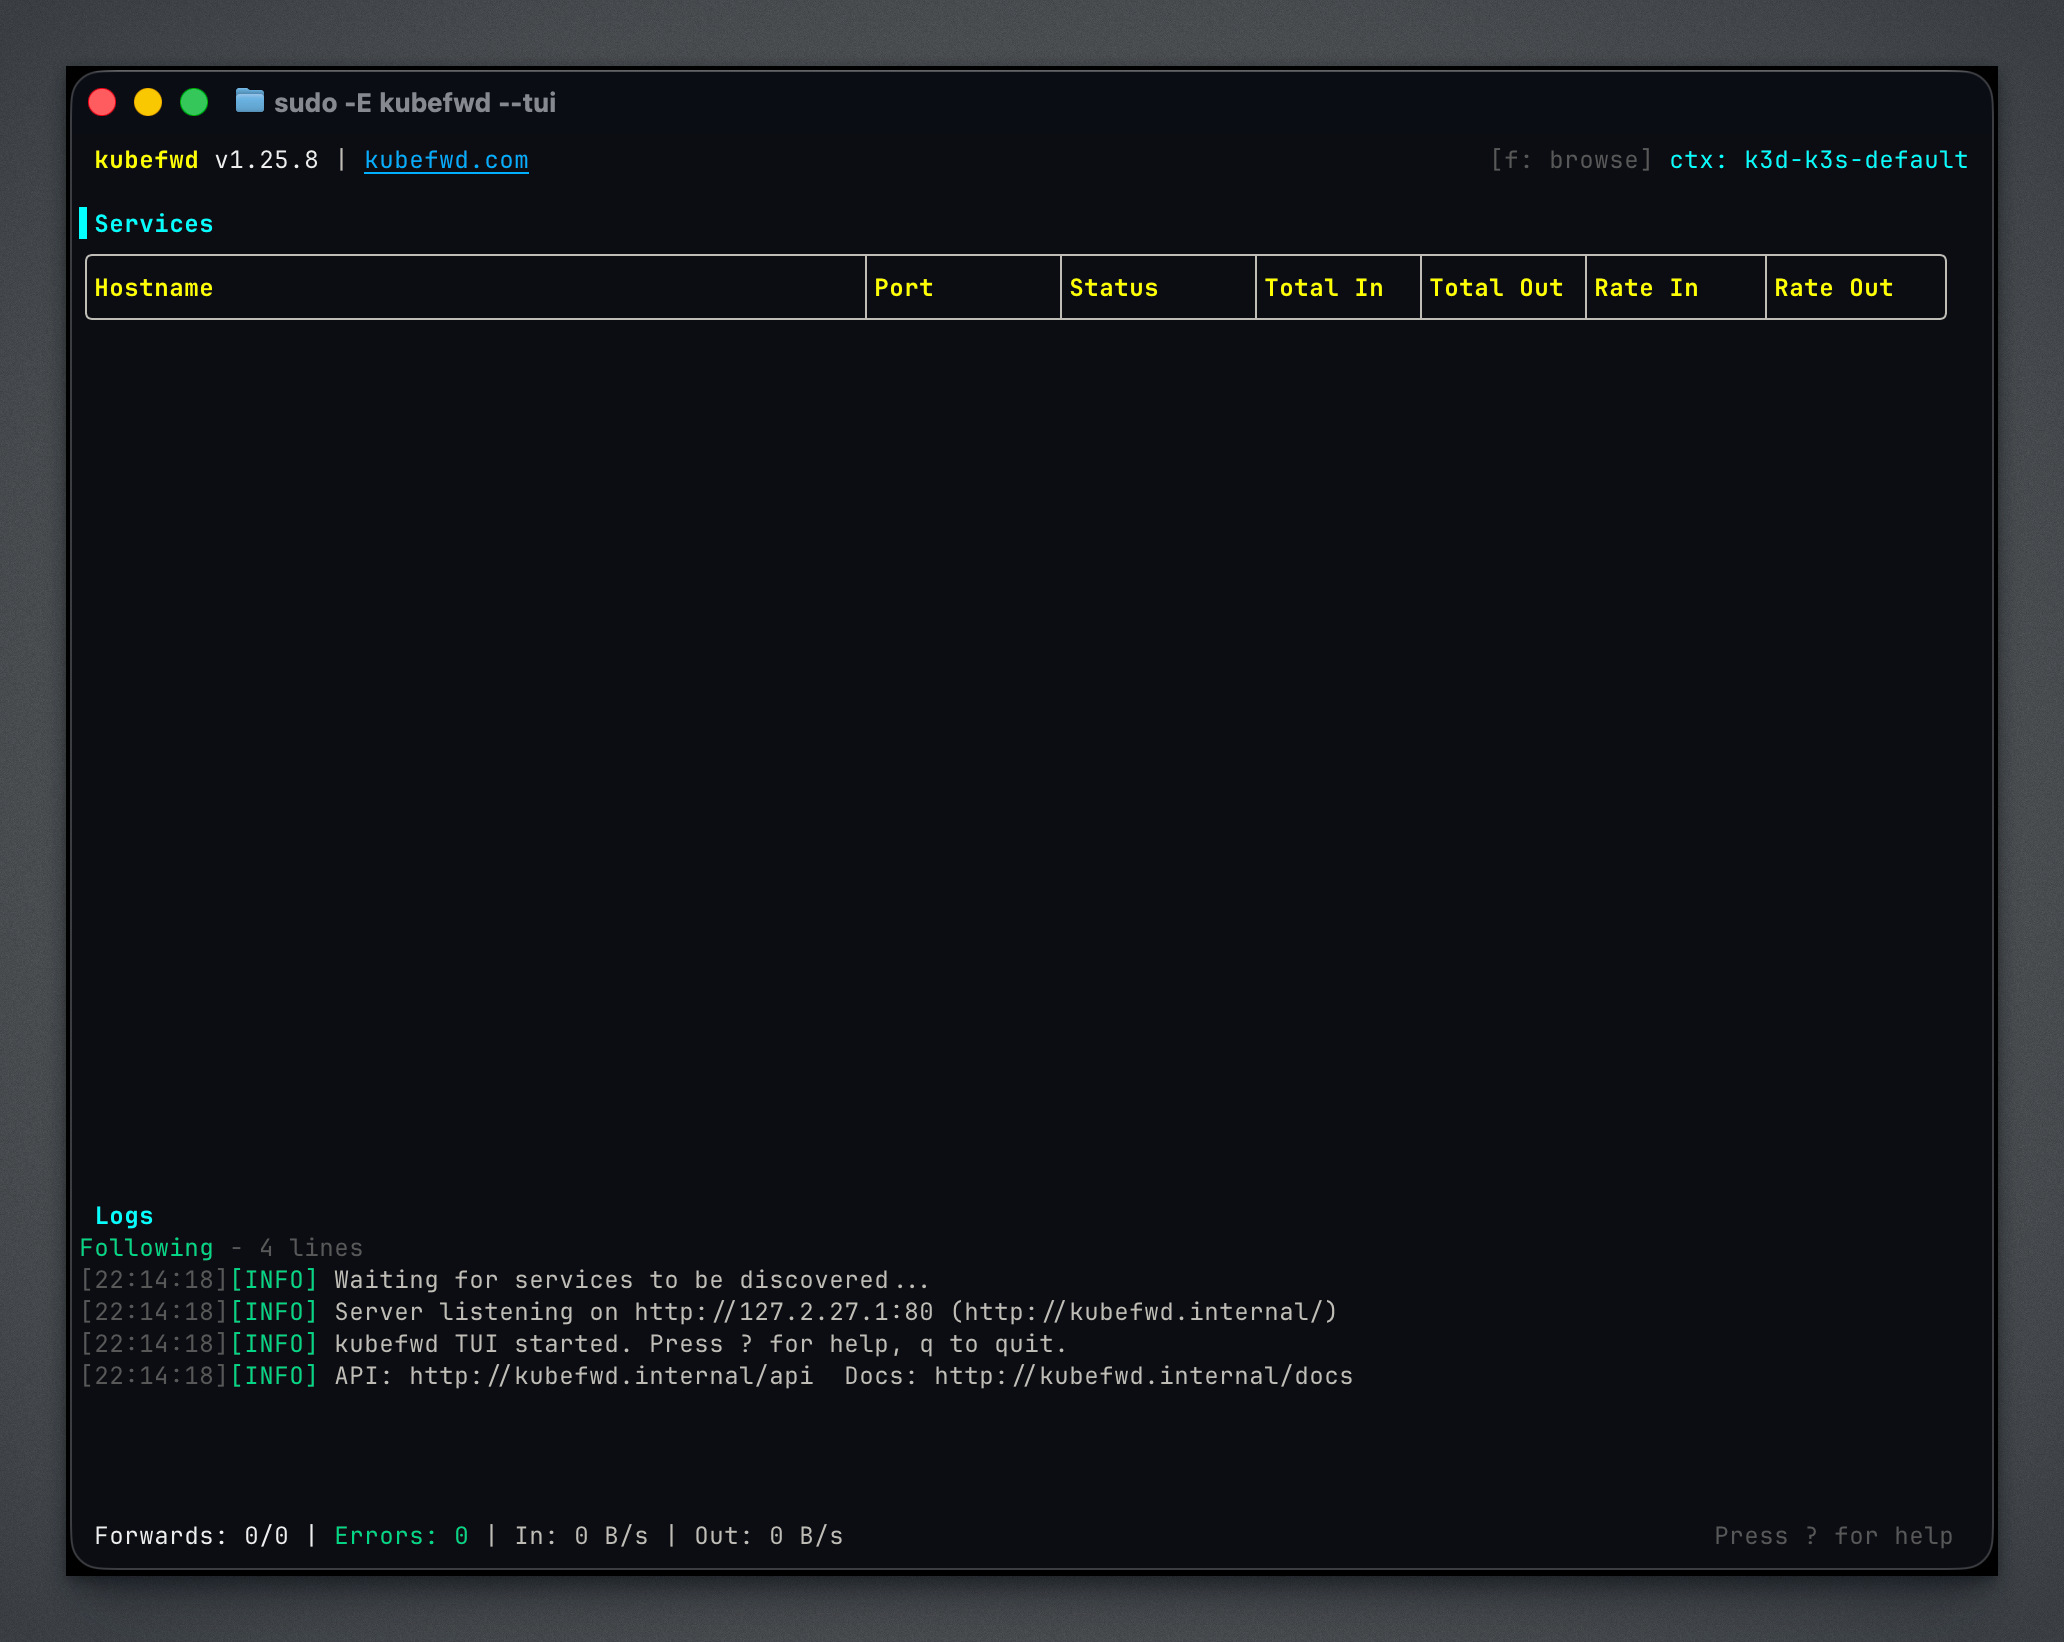
When you start kubefwd with sudo -E kubefwd --tui, the TUI opens in idle mode with no services forwarded. The main view shows an empty Services table with columns for Hostname, Port, Status, and traffic metrics. The Logs panel displays startup messages including the REST API endpoint (http://kubefwd.internal/api) and interactive documentation URL (http://kubefwd.internal/docs). The status bar at the bottom shows forward counts and aggregate throughput. Press ? for help or f to browse namespaces and start forwarding services.
Keyboard Shortcuts
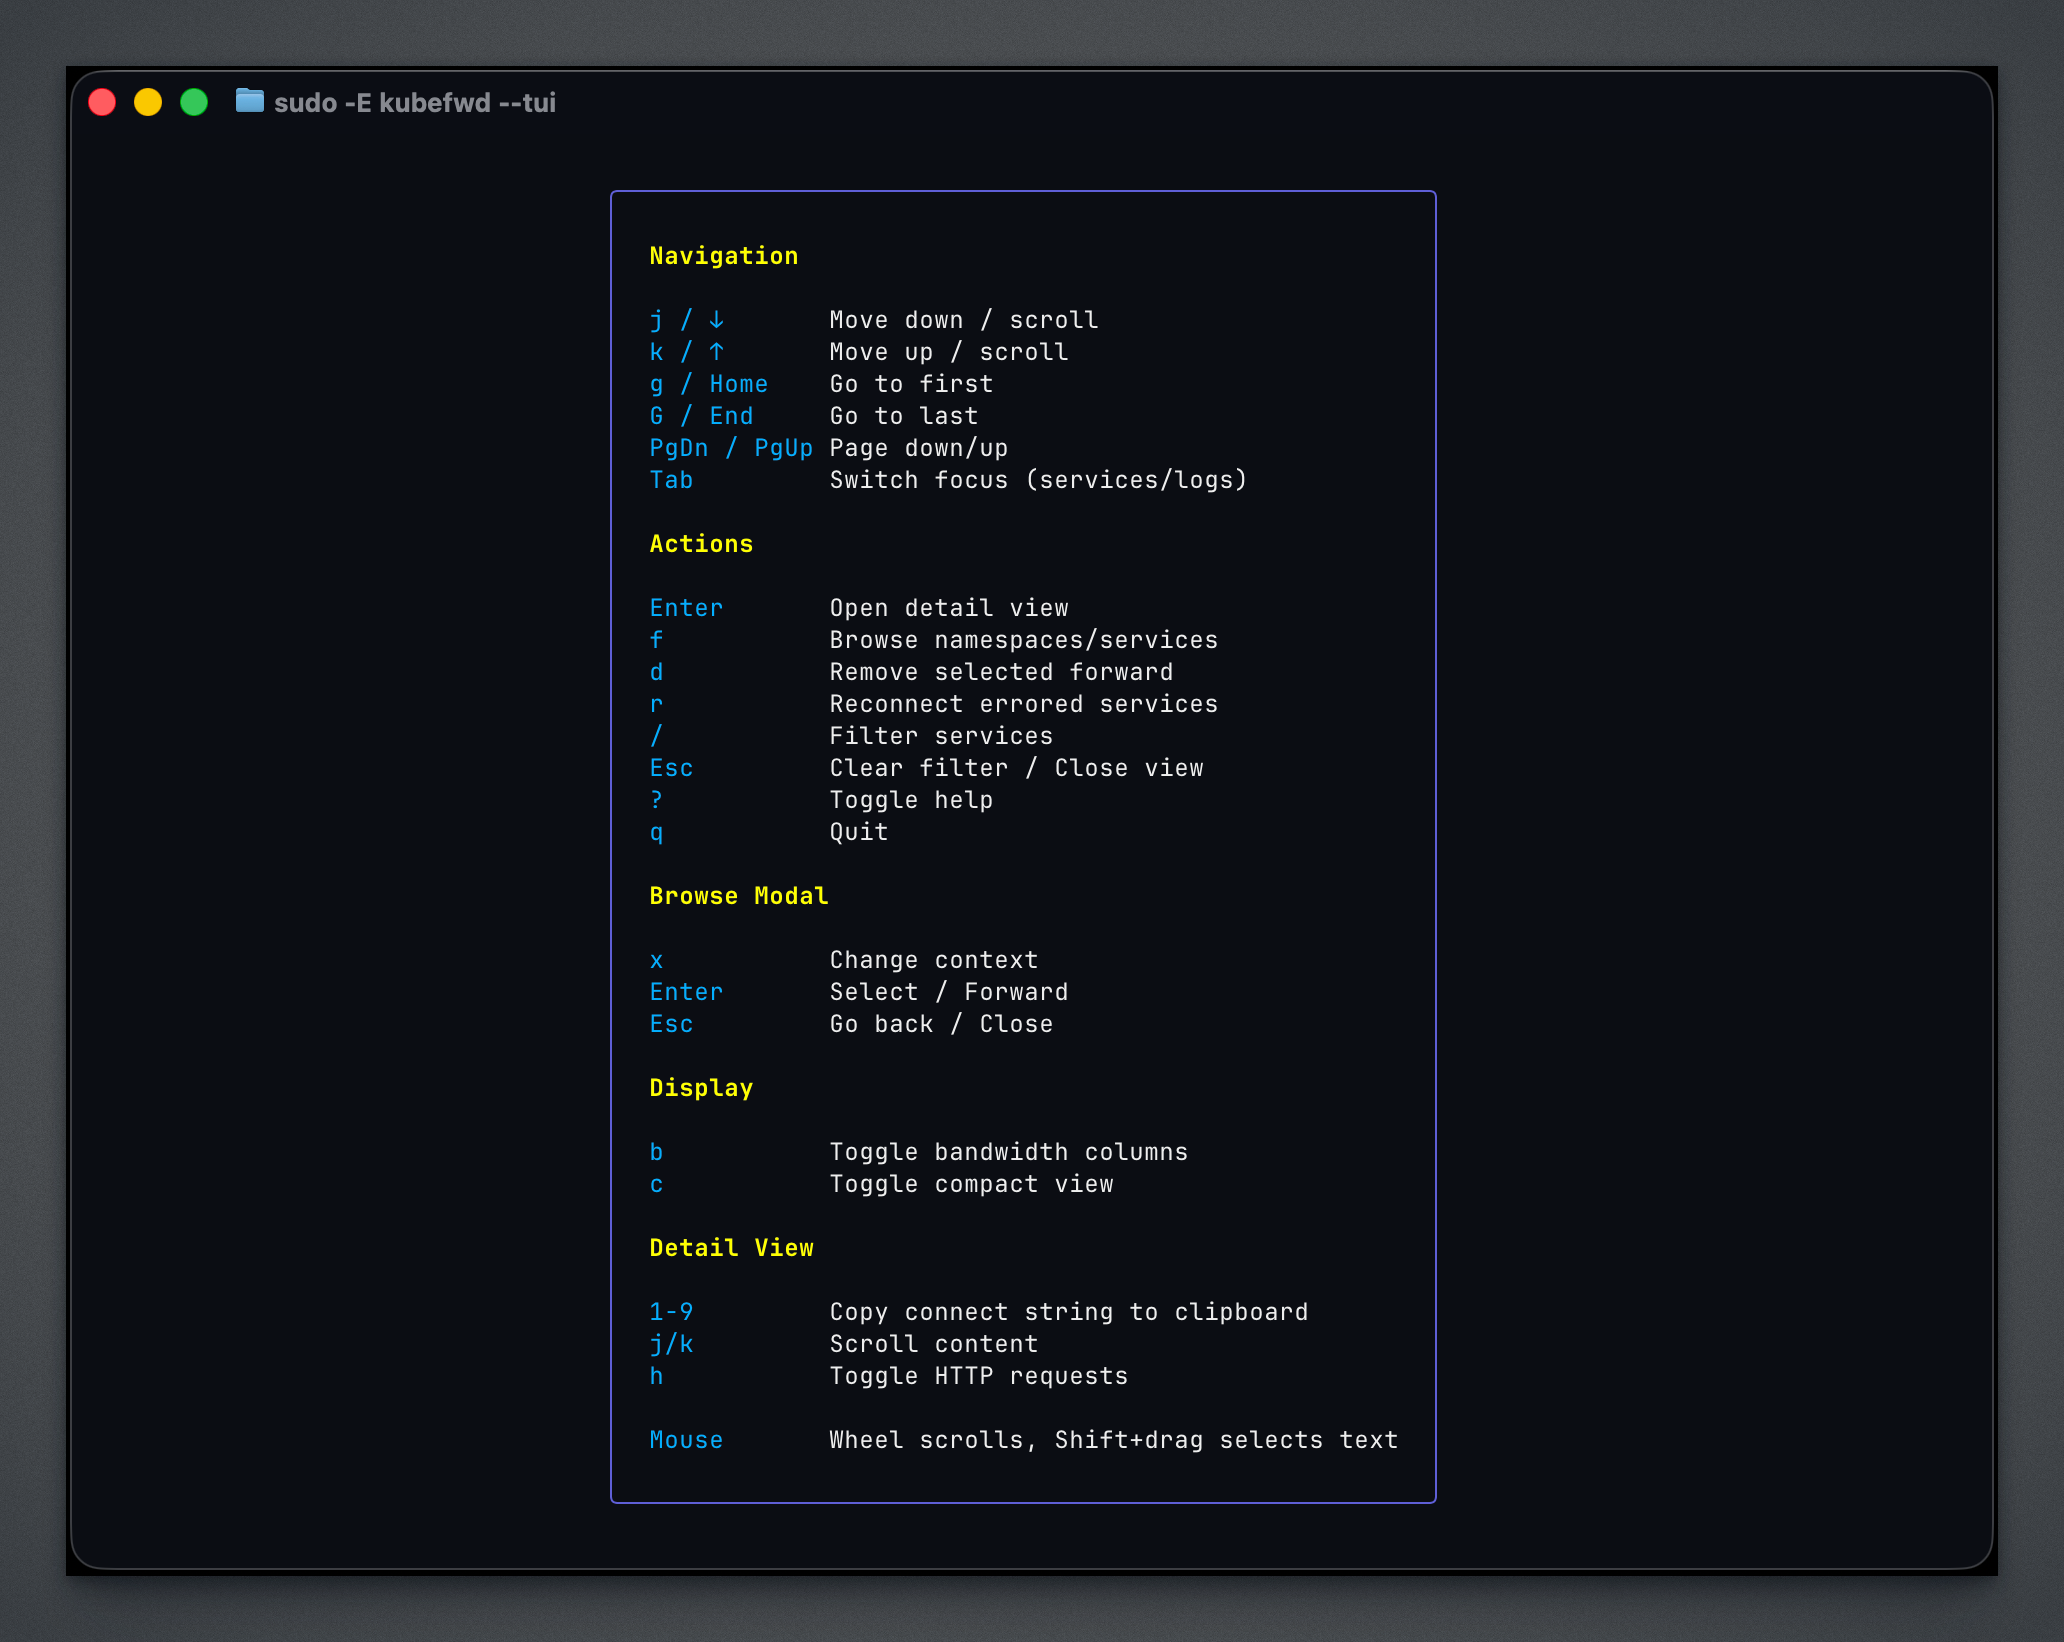
Press ? to display the help overlay with all available keyboard shortcuts. Navigation uses vim-style keys (j/k for up/down, g/G for first/last). Actions include f to browse namespaces and services, d to remove a forward, r to reconnect errored services, and / to filter the service list. The browse modal has its own shortcuts for changing Kubernetes contexts (x) and selecting items. Display options let you toggle bandwidth columns (b) and compact view (c). In the detail view, number keys 1-9 copy connection strings to the clipboard.
Browse Namespaces
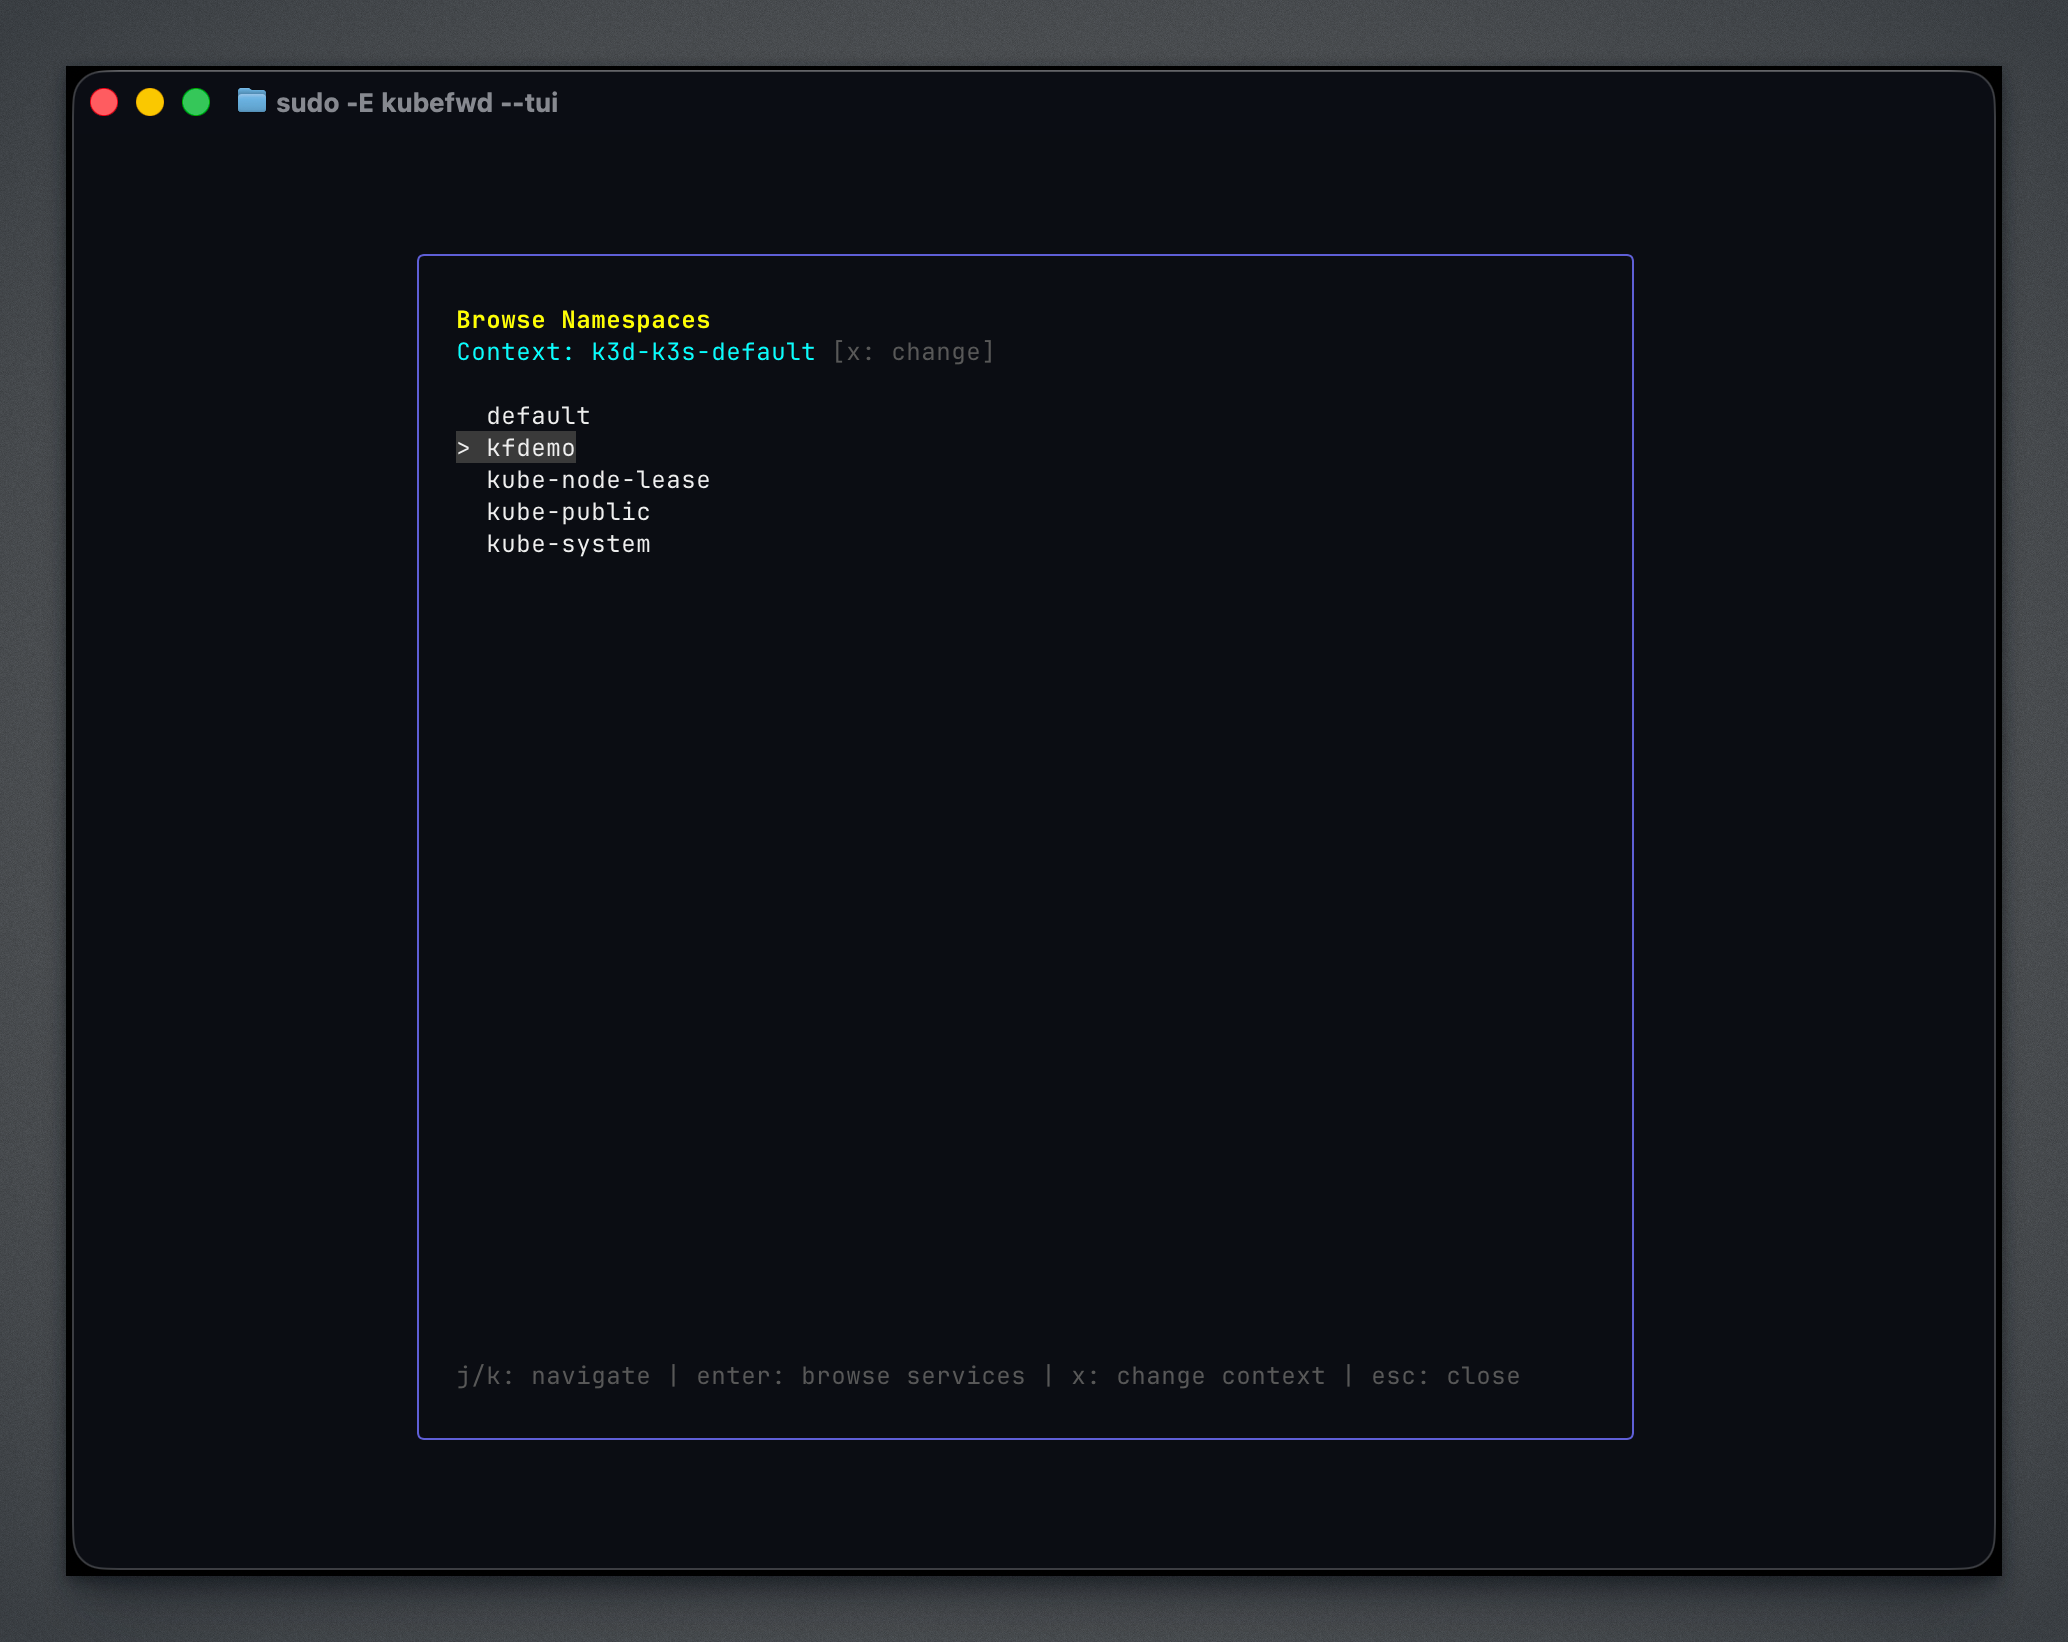
Press f to open the browse modal. The first screen lists all namespaces in your current Kubernetes context. Navigate with j/k or arrow keys, press Enter to browse services in a namespace, or press x to switch to a different cluster context. In this example, the kfdemo namespace is highlighted. You can browse namespaces from multiple clusters and forward services from all of them simultaneously.
Browse Services
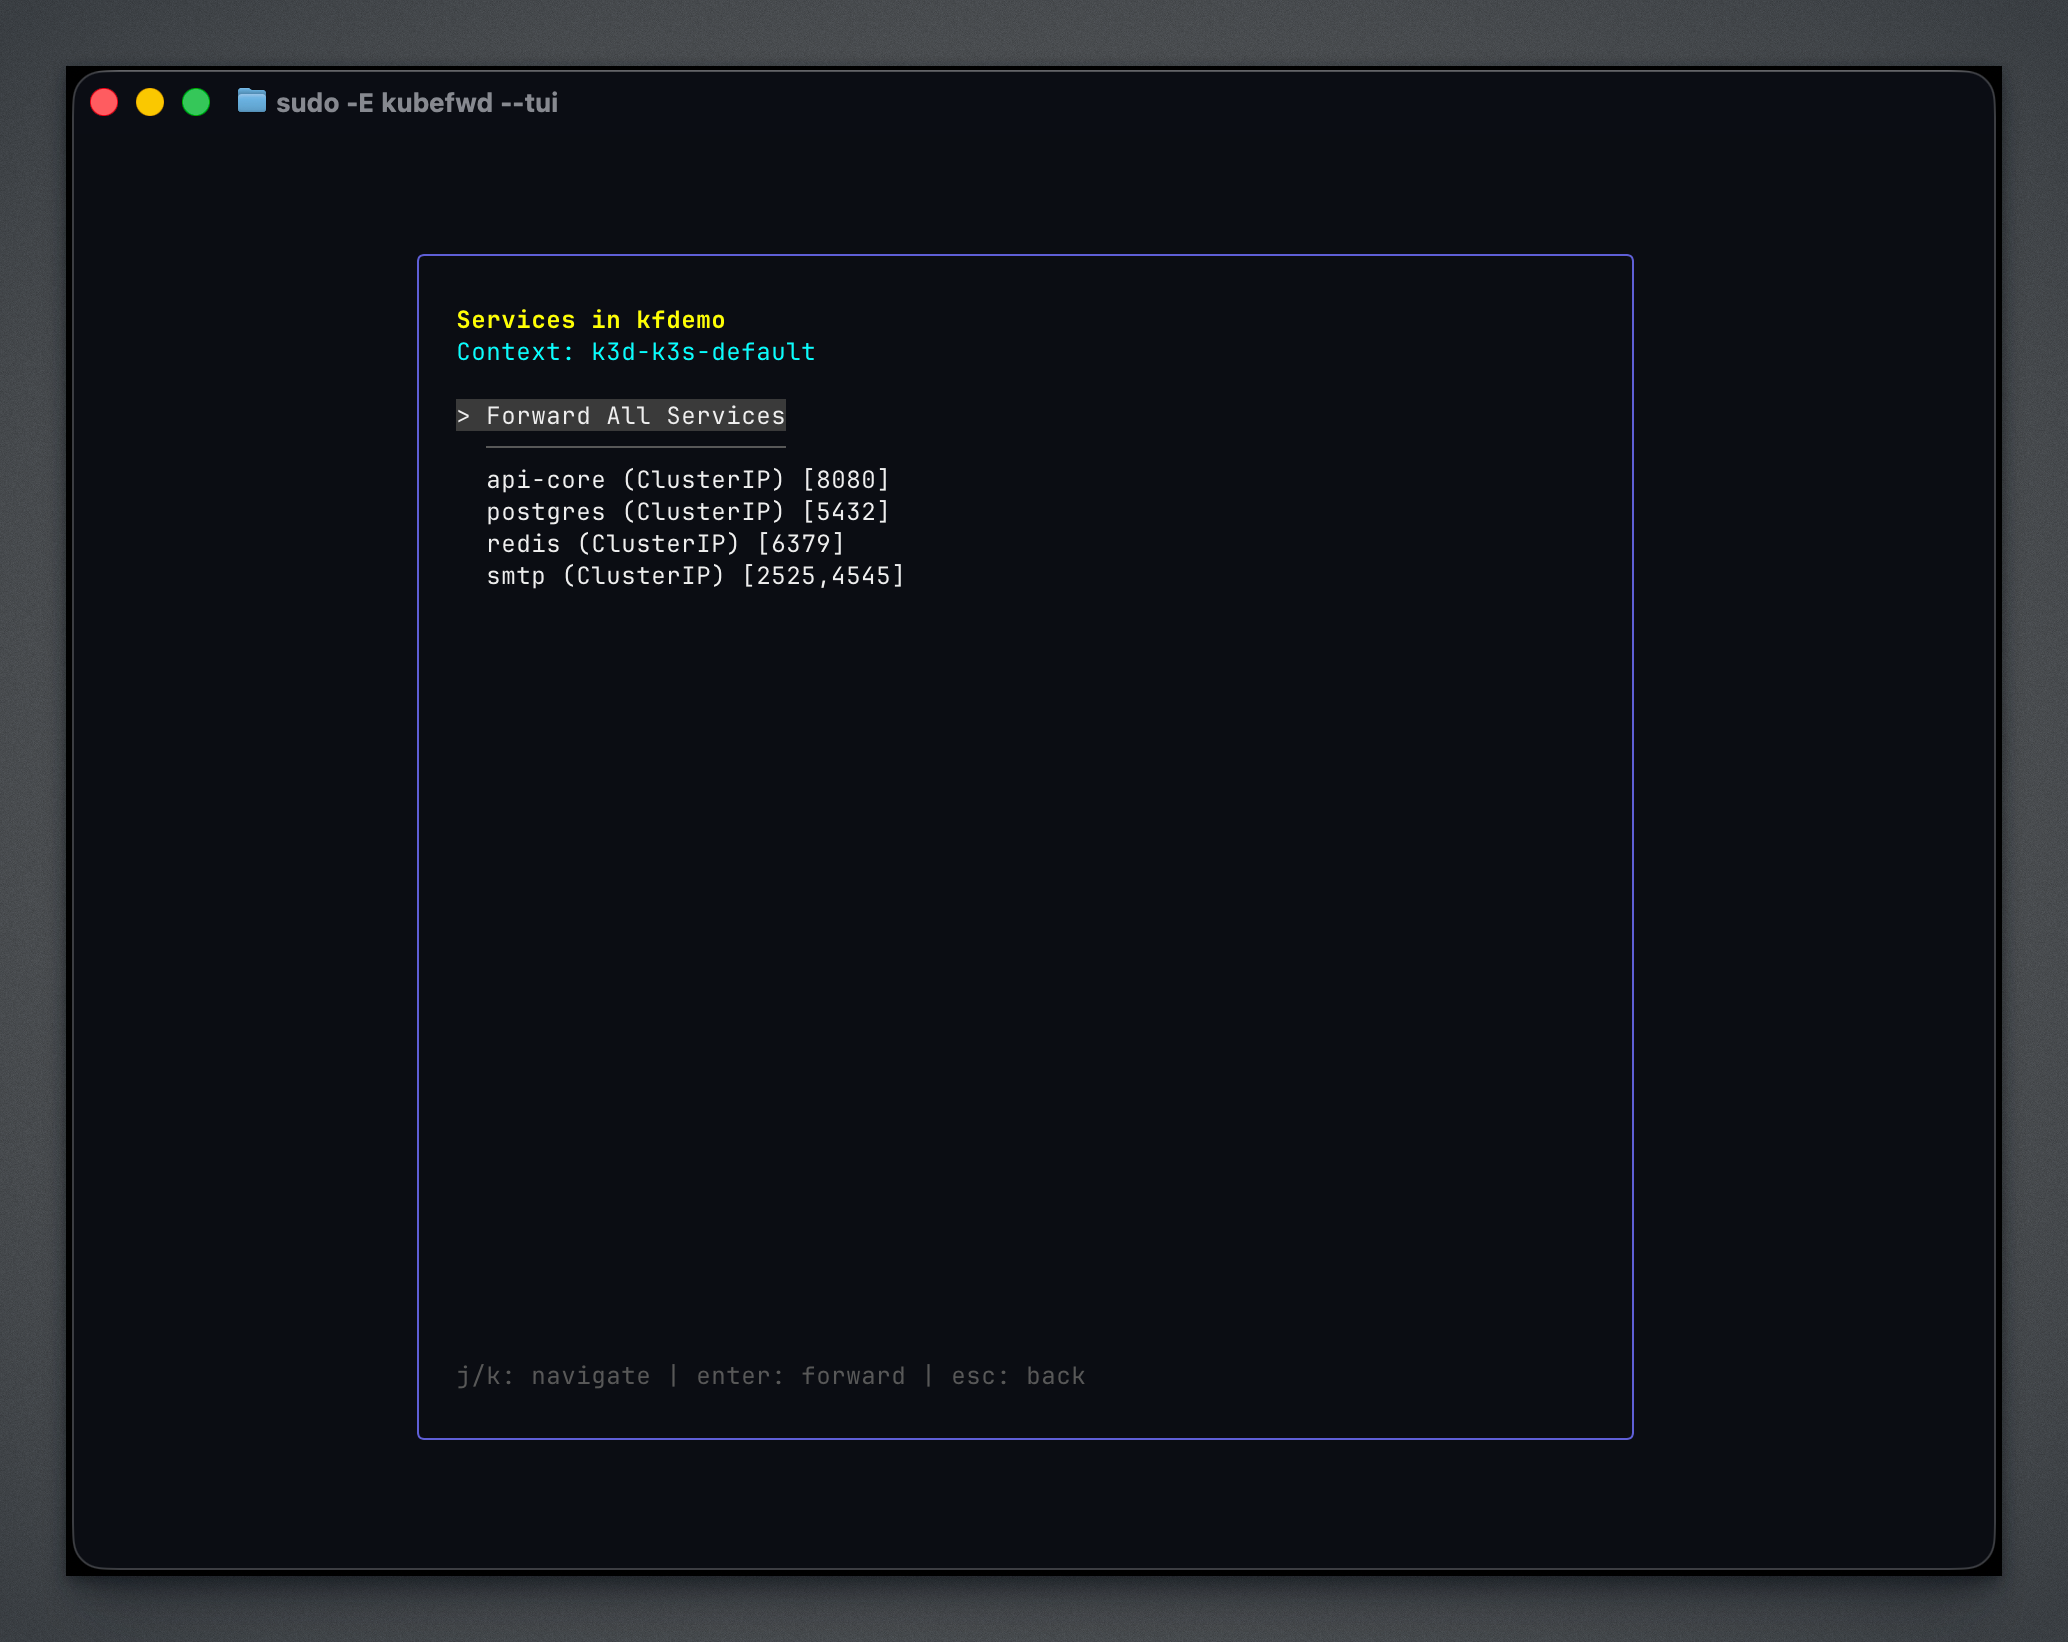
After selecting a namespace, the modal displays available services with their type and ports. The first option, “Forward All Services,” forwards every service in the namespace with one keystroke. Individual services show their ClusterIP type and port numbers. Select a service and press Enter to forward it, or navigate back with Esc to choose a different namespace.
Active Forwards
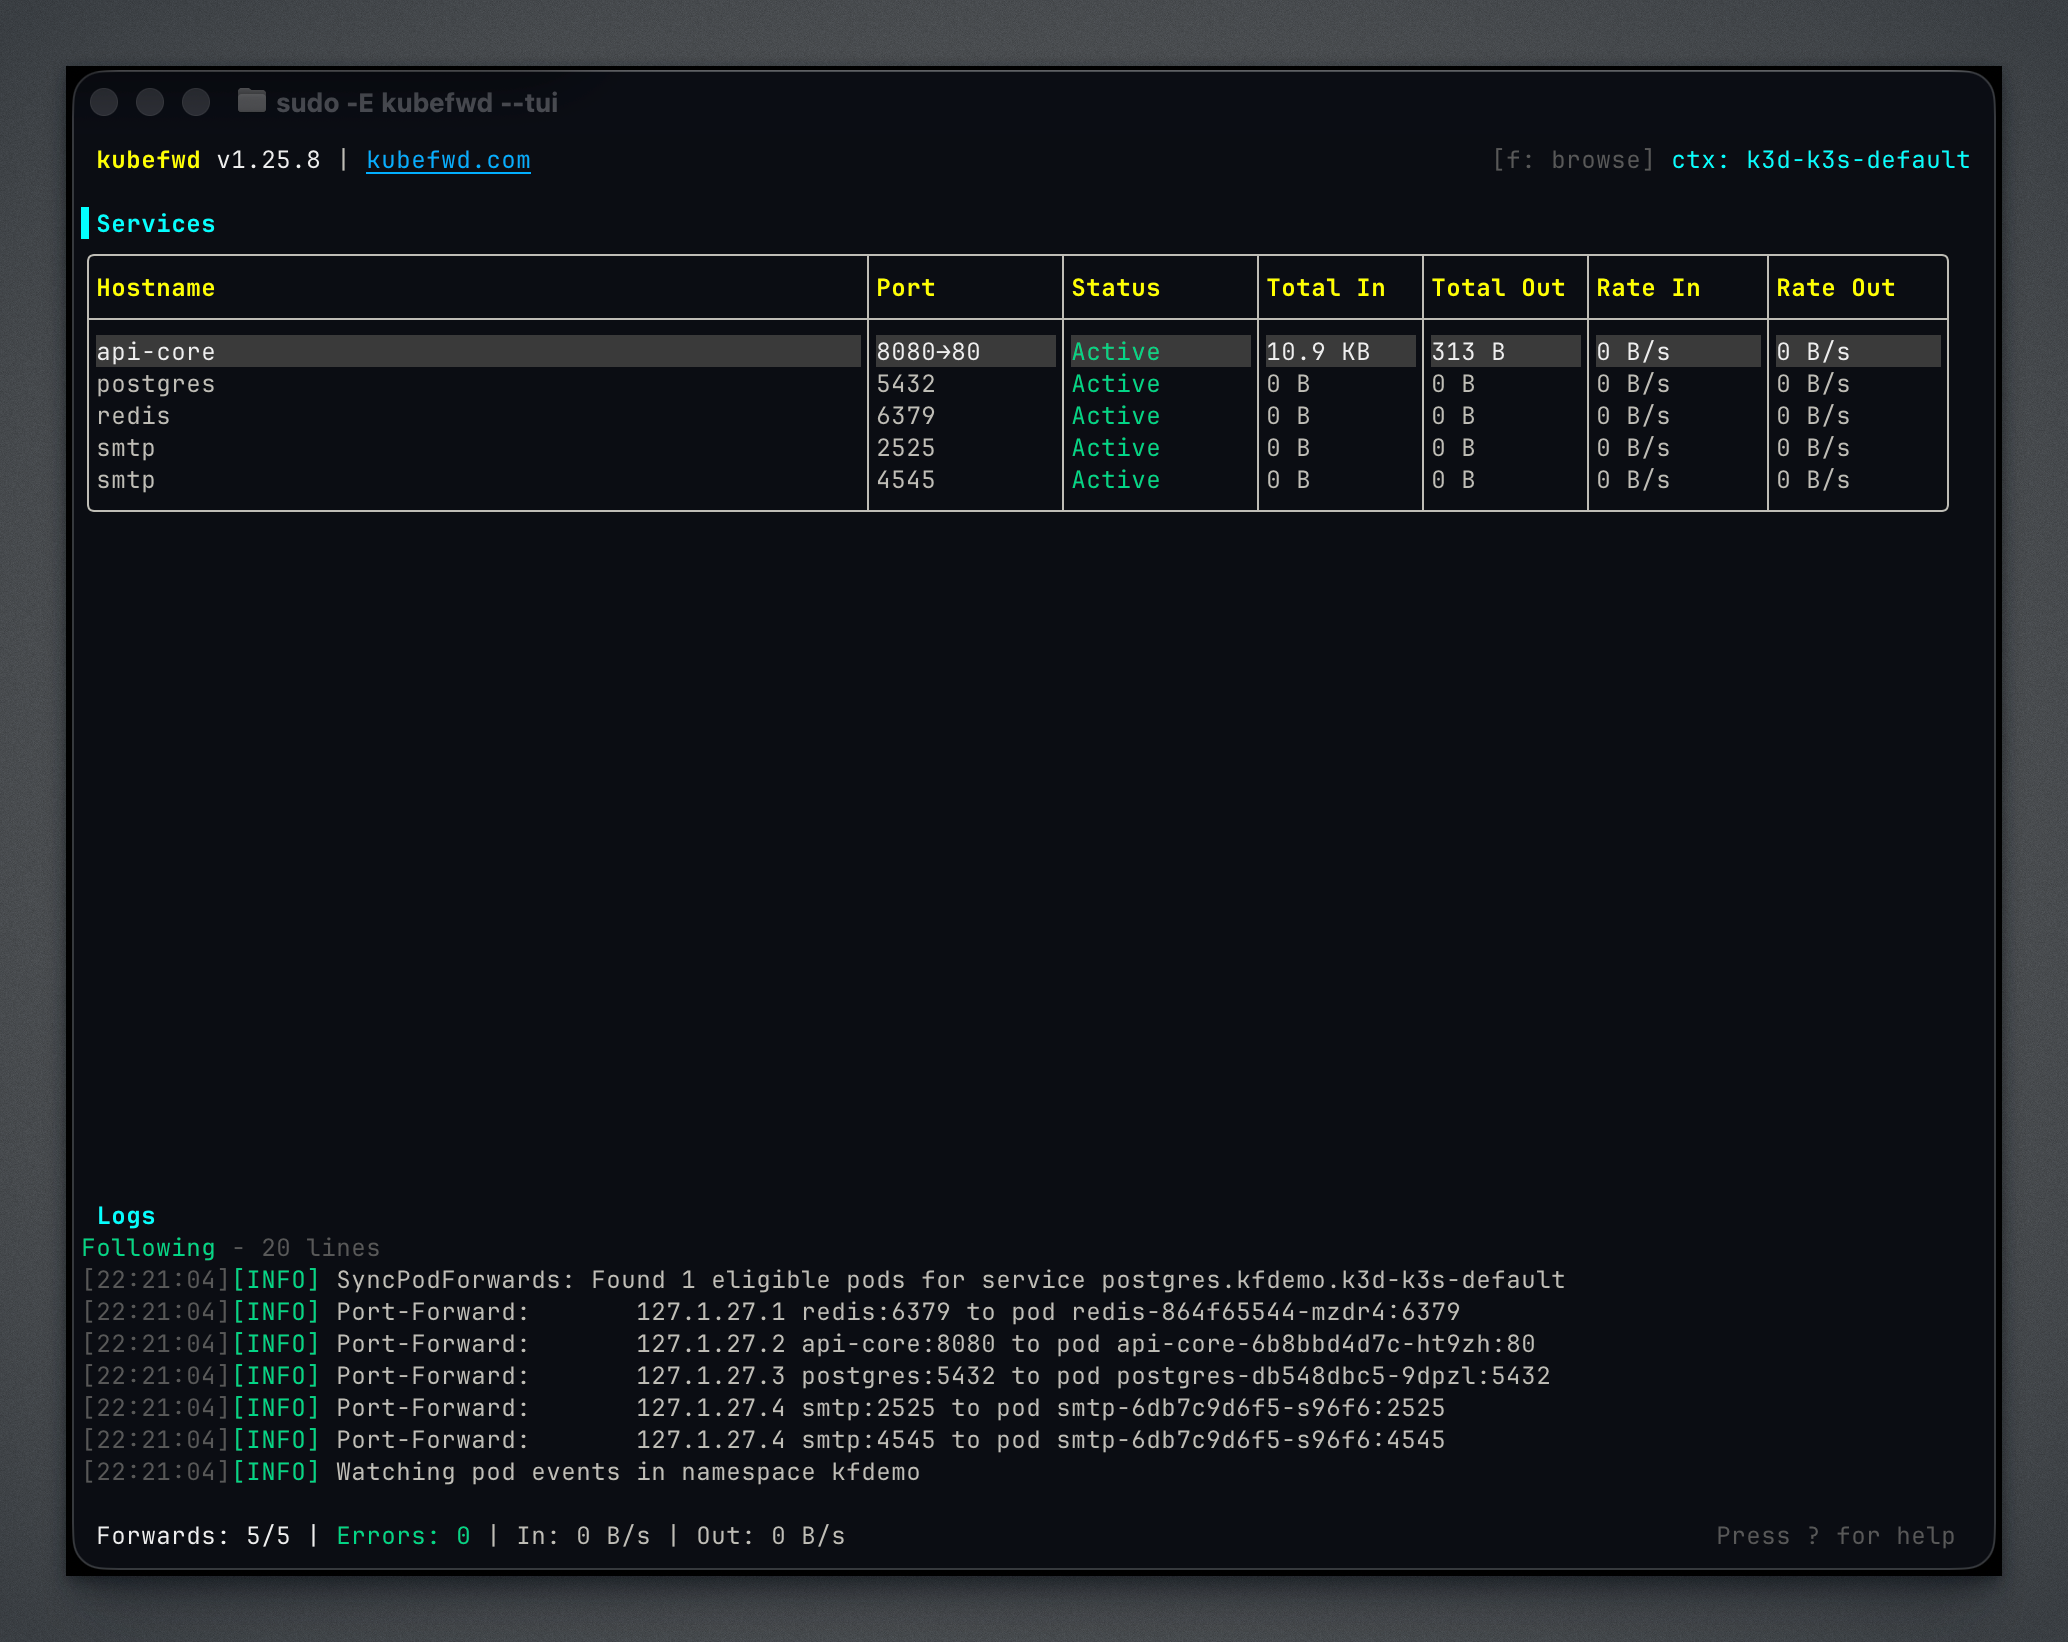
Once services are forwarded, the main view populates with active connections. Each row shows the service hostname, port, connection status, and real-time traffic statistics (Total In/Out in bytes, Rate In/Out in bytes per second). The Logs panel streams port-forward events as kubefwd establishes connections to pods. The status bar updates to show “Forwards: 5/5” indicating all five requested forwards are active. Select any service and press Enter to open its detail view.
Service Detail: Connection Strings
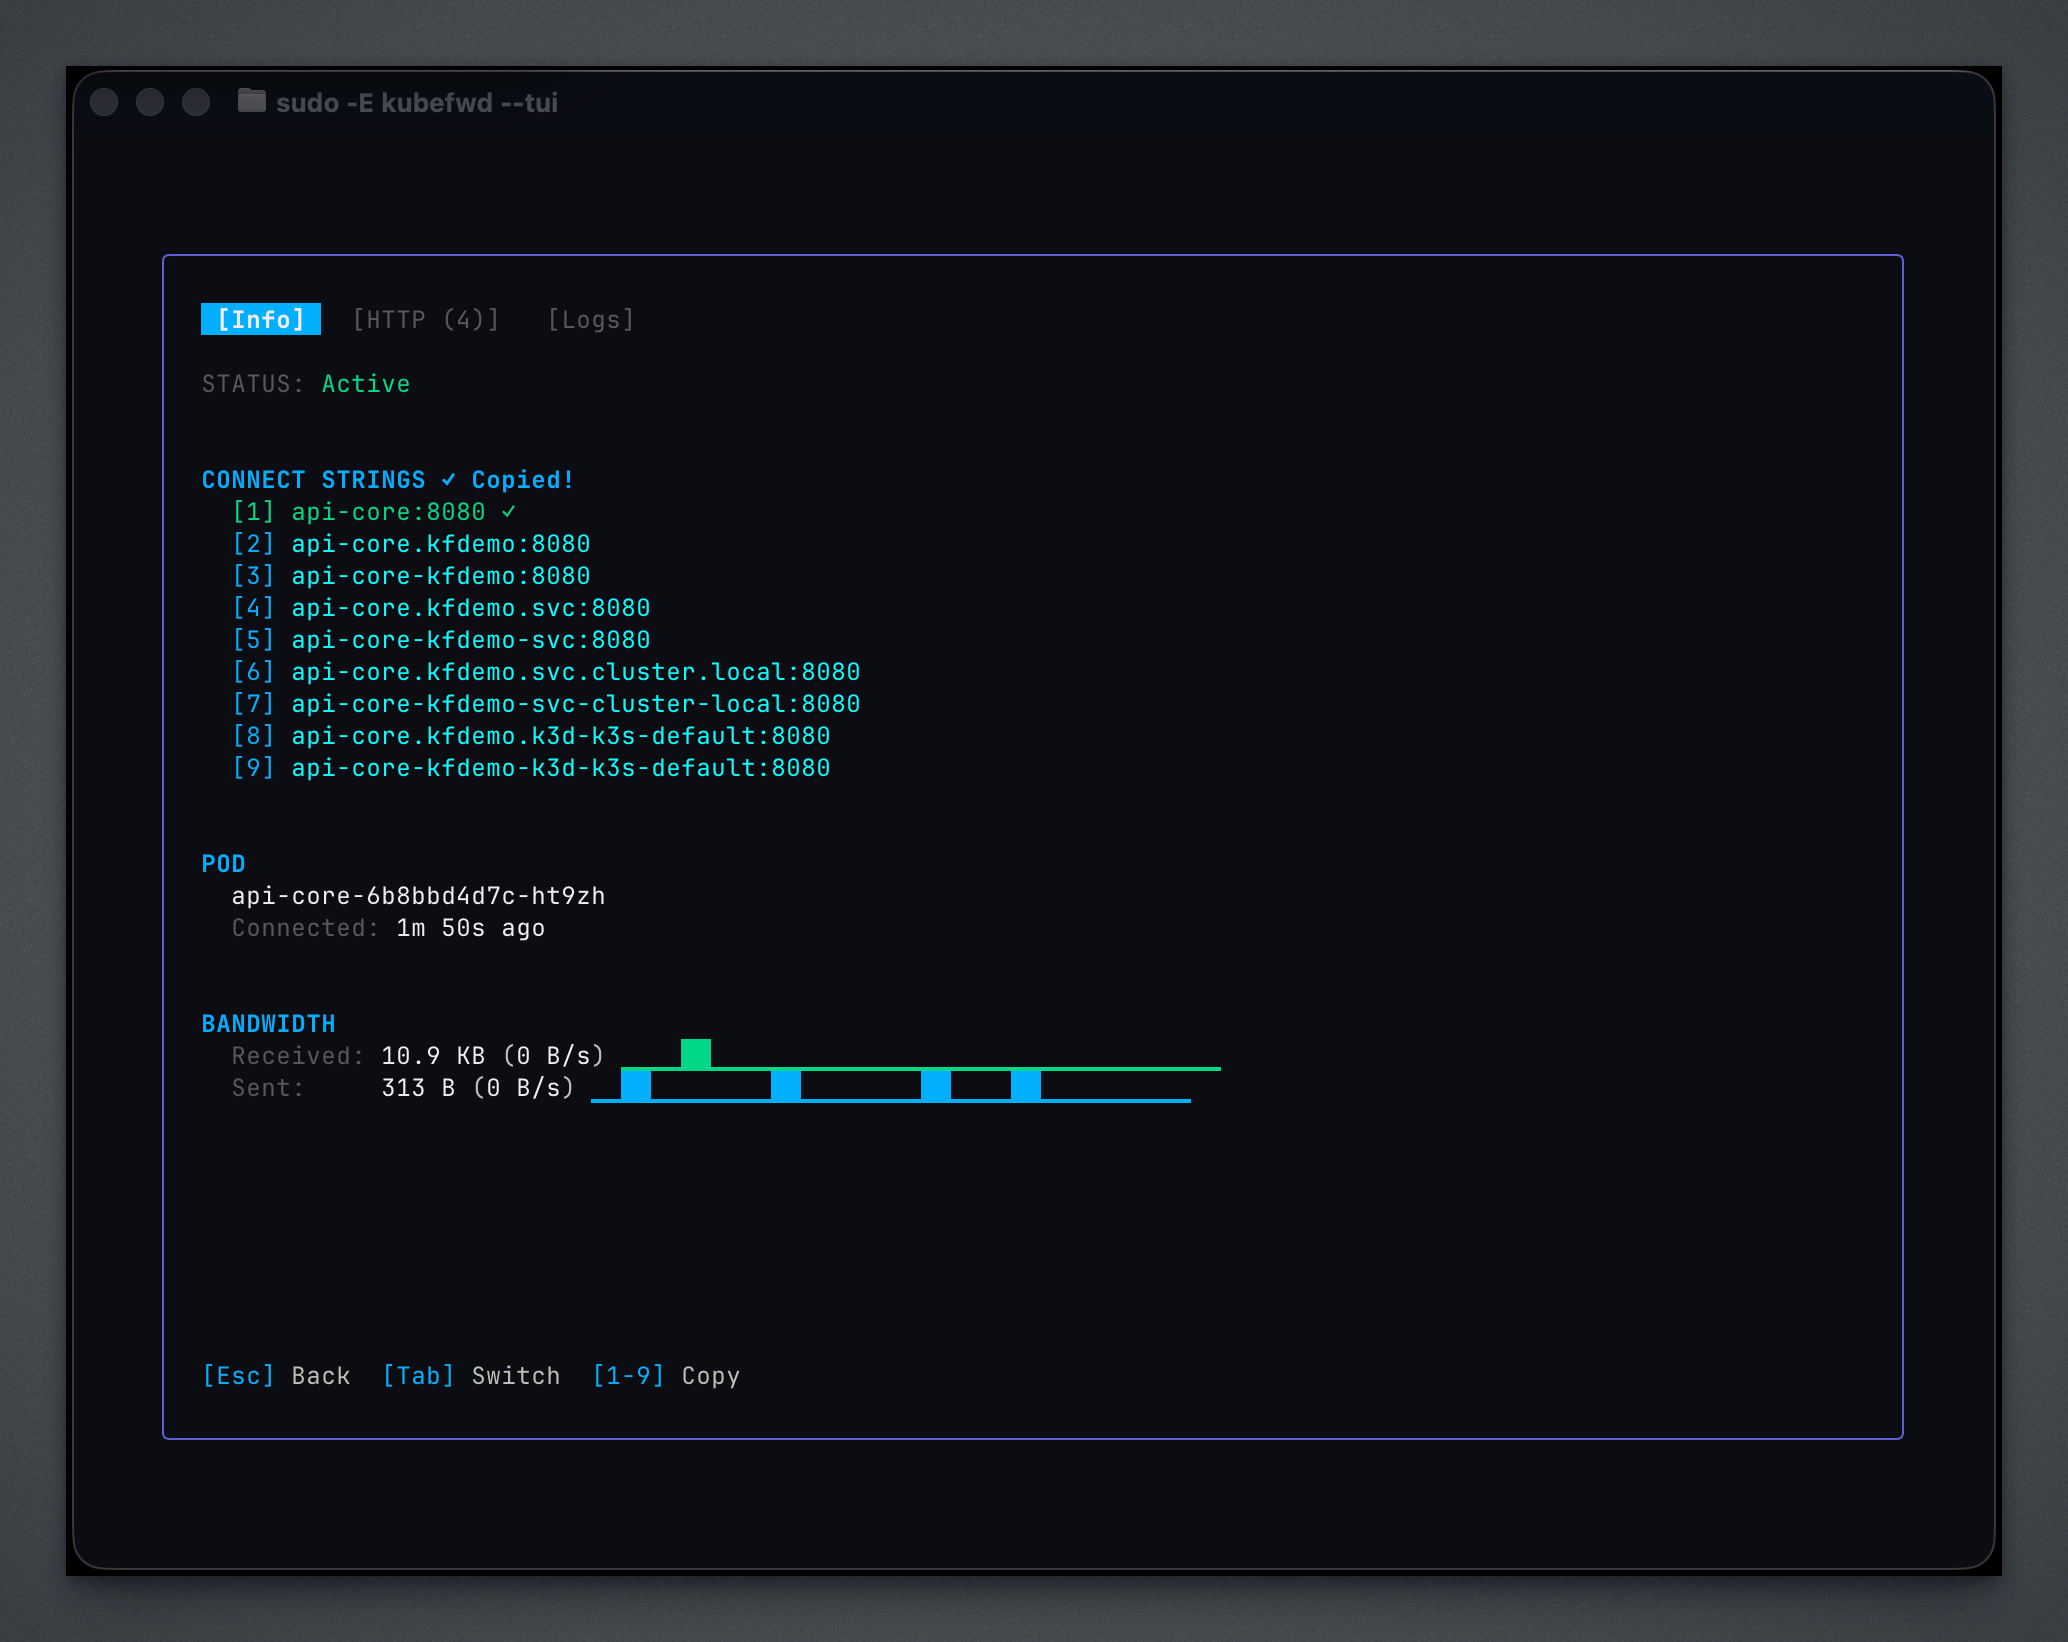
The detail view’s Info tab displays everything you need to connect to a forwarded service. The “Connect Strings” section lists all available hostnames, from the simple service name (api-core:8080) to fully qualified cluster DNS names (api-core.kfdemo.svc.cluster.local:8080). Press number keys 1-9 to copy any connection string directly to your clipboard. Below that, the Pod section shows which pod is handling the forward and how long it has been connected. The Bandwidth section displays traffic statistics with visual throughput bars.
Service Detail: Pod Logs
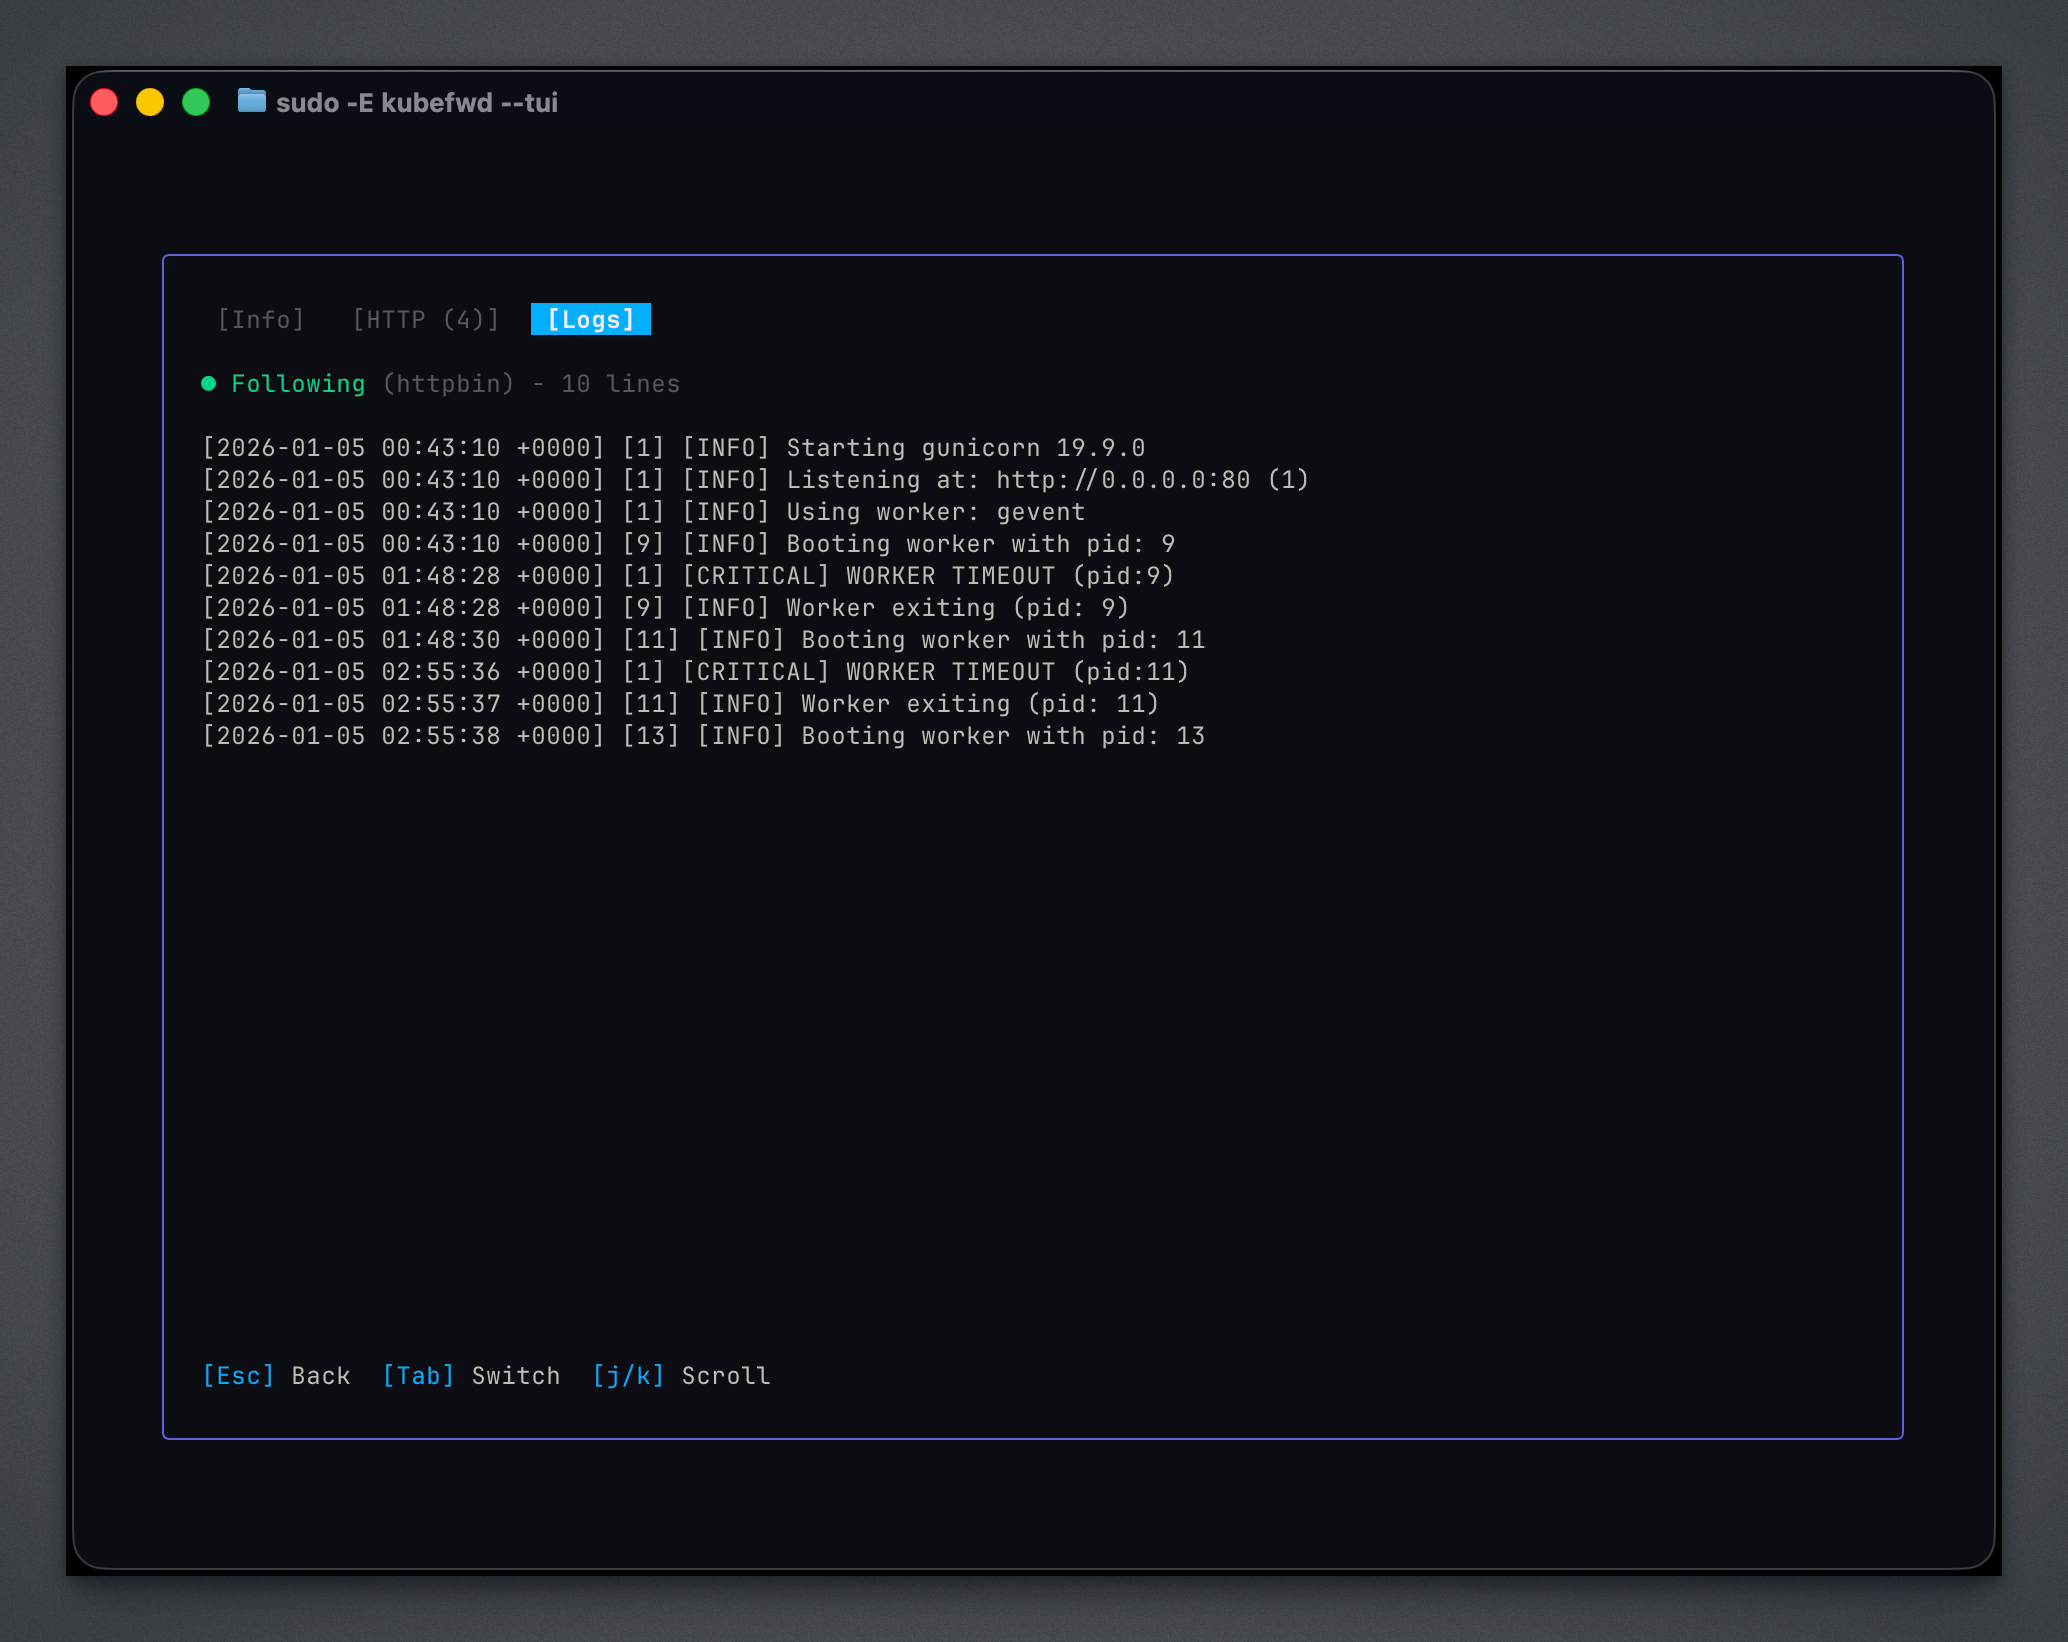
The Logs tab streams live output from the forwarded pod. This example shows gunicorn worker logs including startup messages, worker timeouts, and process restarts. Log streaming helps debug connection issues or understand service behavior without switching to a separate terminal window. Use j/k to scroll through log history. The log follows new output automatically when scrolled to the bottom.
Service Detail: HTTP Tracing
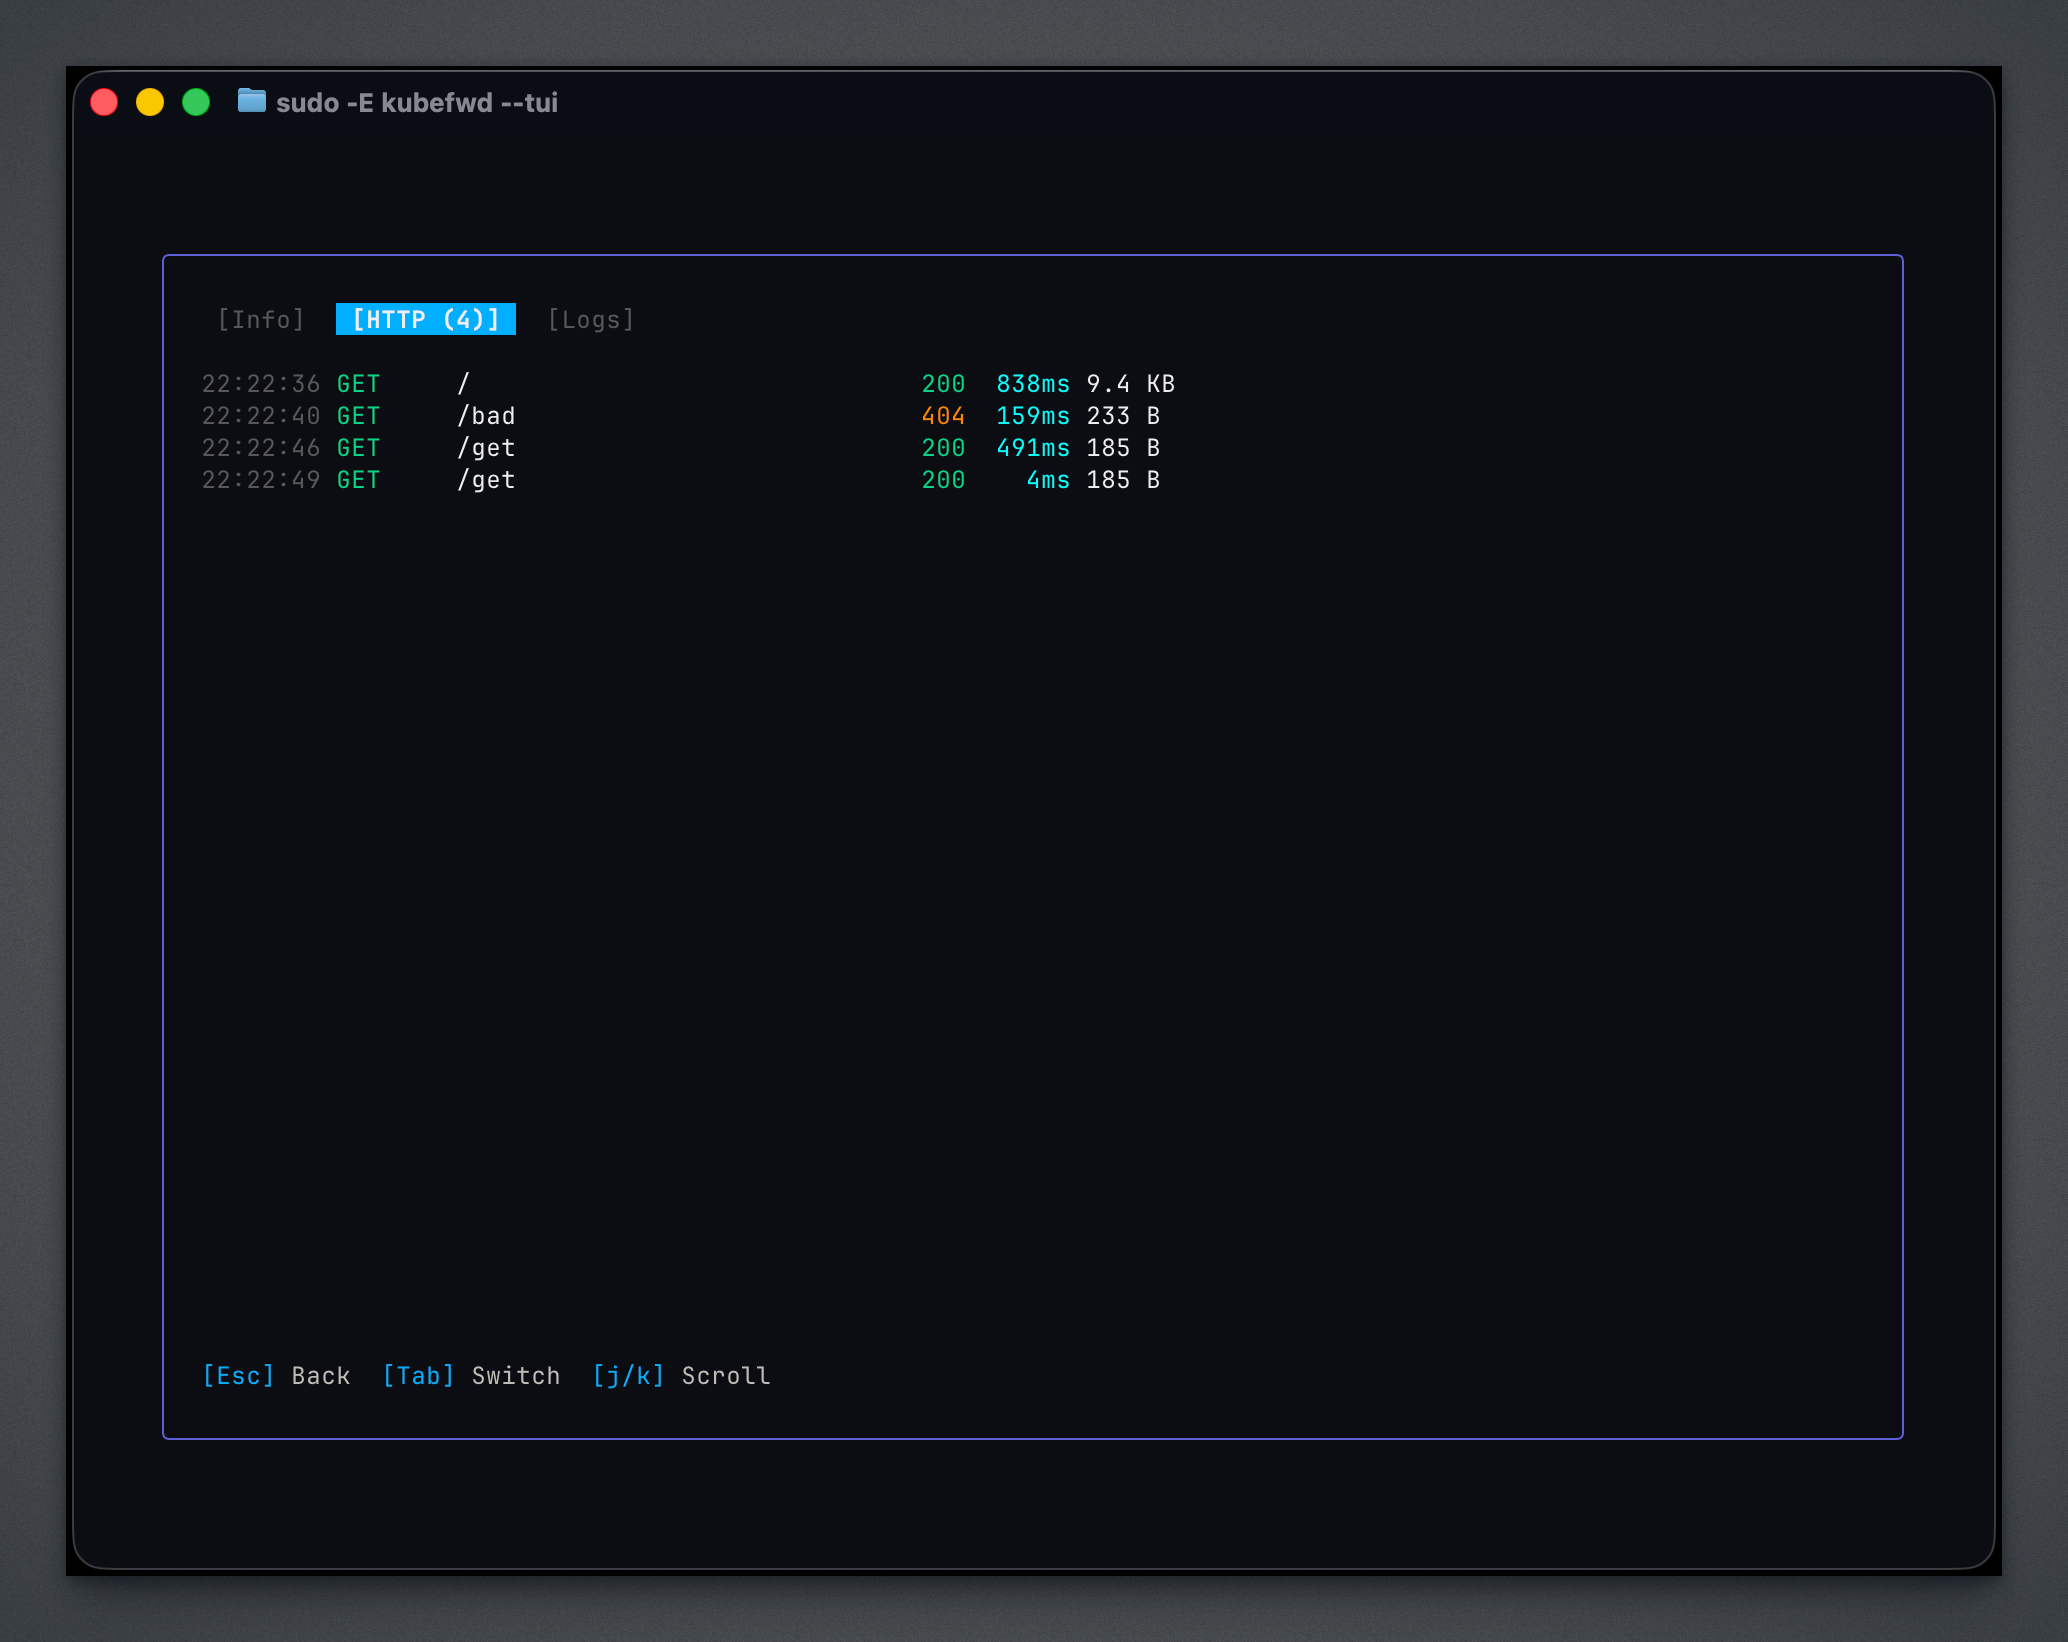
The HTTP tab captures HTTP requests flowing through the forward. Each line shows the timestamp, method, path, response code, latency, and response size. Color-coded status codes make it easy to spot errors at a glance (green for 2xx, red for 4xx/5xx). This view helps debug API calls, verify request routing, and measure response times without external tools. The tab header shows the total request count.
Auto-Reconnect
One of the most requested features was automatic reconnection. The previous behavior required manual intervention when pods restarted or network connectivity dropped.
kubefwd now implements a two-level approach to reliability:
Level 1: Kubernetes Informers kubefwd watches pod lifecycle events through Kubernetes informers. When a pod restarts, gets rescheduled, or is replaced by a deployment update, kubefwd detects the change immediately and reconnects to the new pod.
Level 2: Connection Monitoring For issues that don’t trigger Kubernetes events (network outages, VPN reconnections, transient failures), kubefwd monitors the actual TCP connections. When a connection fails, it retries with exponential backoff, preventing thundering herd problems while ensuring quick recovery when connectivity returns.
Together, these mechanisms mean you can leave kubefwd running through pod deployments, cluster maintenance, and laptop sleep/wake cycles without manual intervention.
REST API
kubefwd exposes 40+ HTTP endpoints for programmatic control:
# List forwarded services
curl http://kubefwd.internal/api/v1/services

# Add a namespace dynamically
curl -X POST http://kubefwd.internal/api/v1/namespaces/staging

# Get traffic metrics
curl http://kubefwd.internal/api/v1/metrics
The kubefwd.internal hostname is managed by kubefwd in /etc/hosts. Full API documentation is available at http://kubefwd.internal/docs when kubefwd is running.
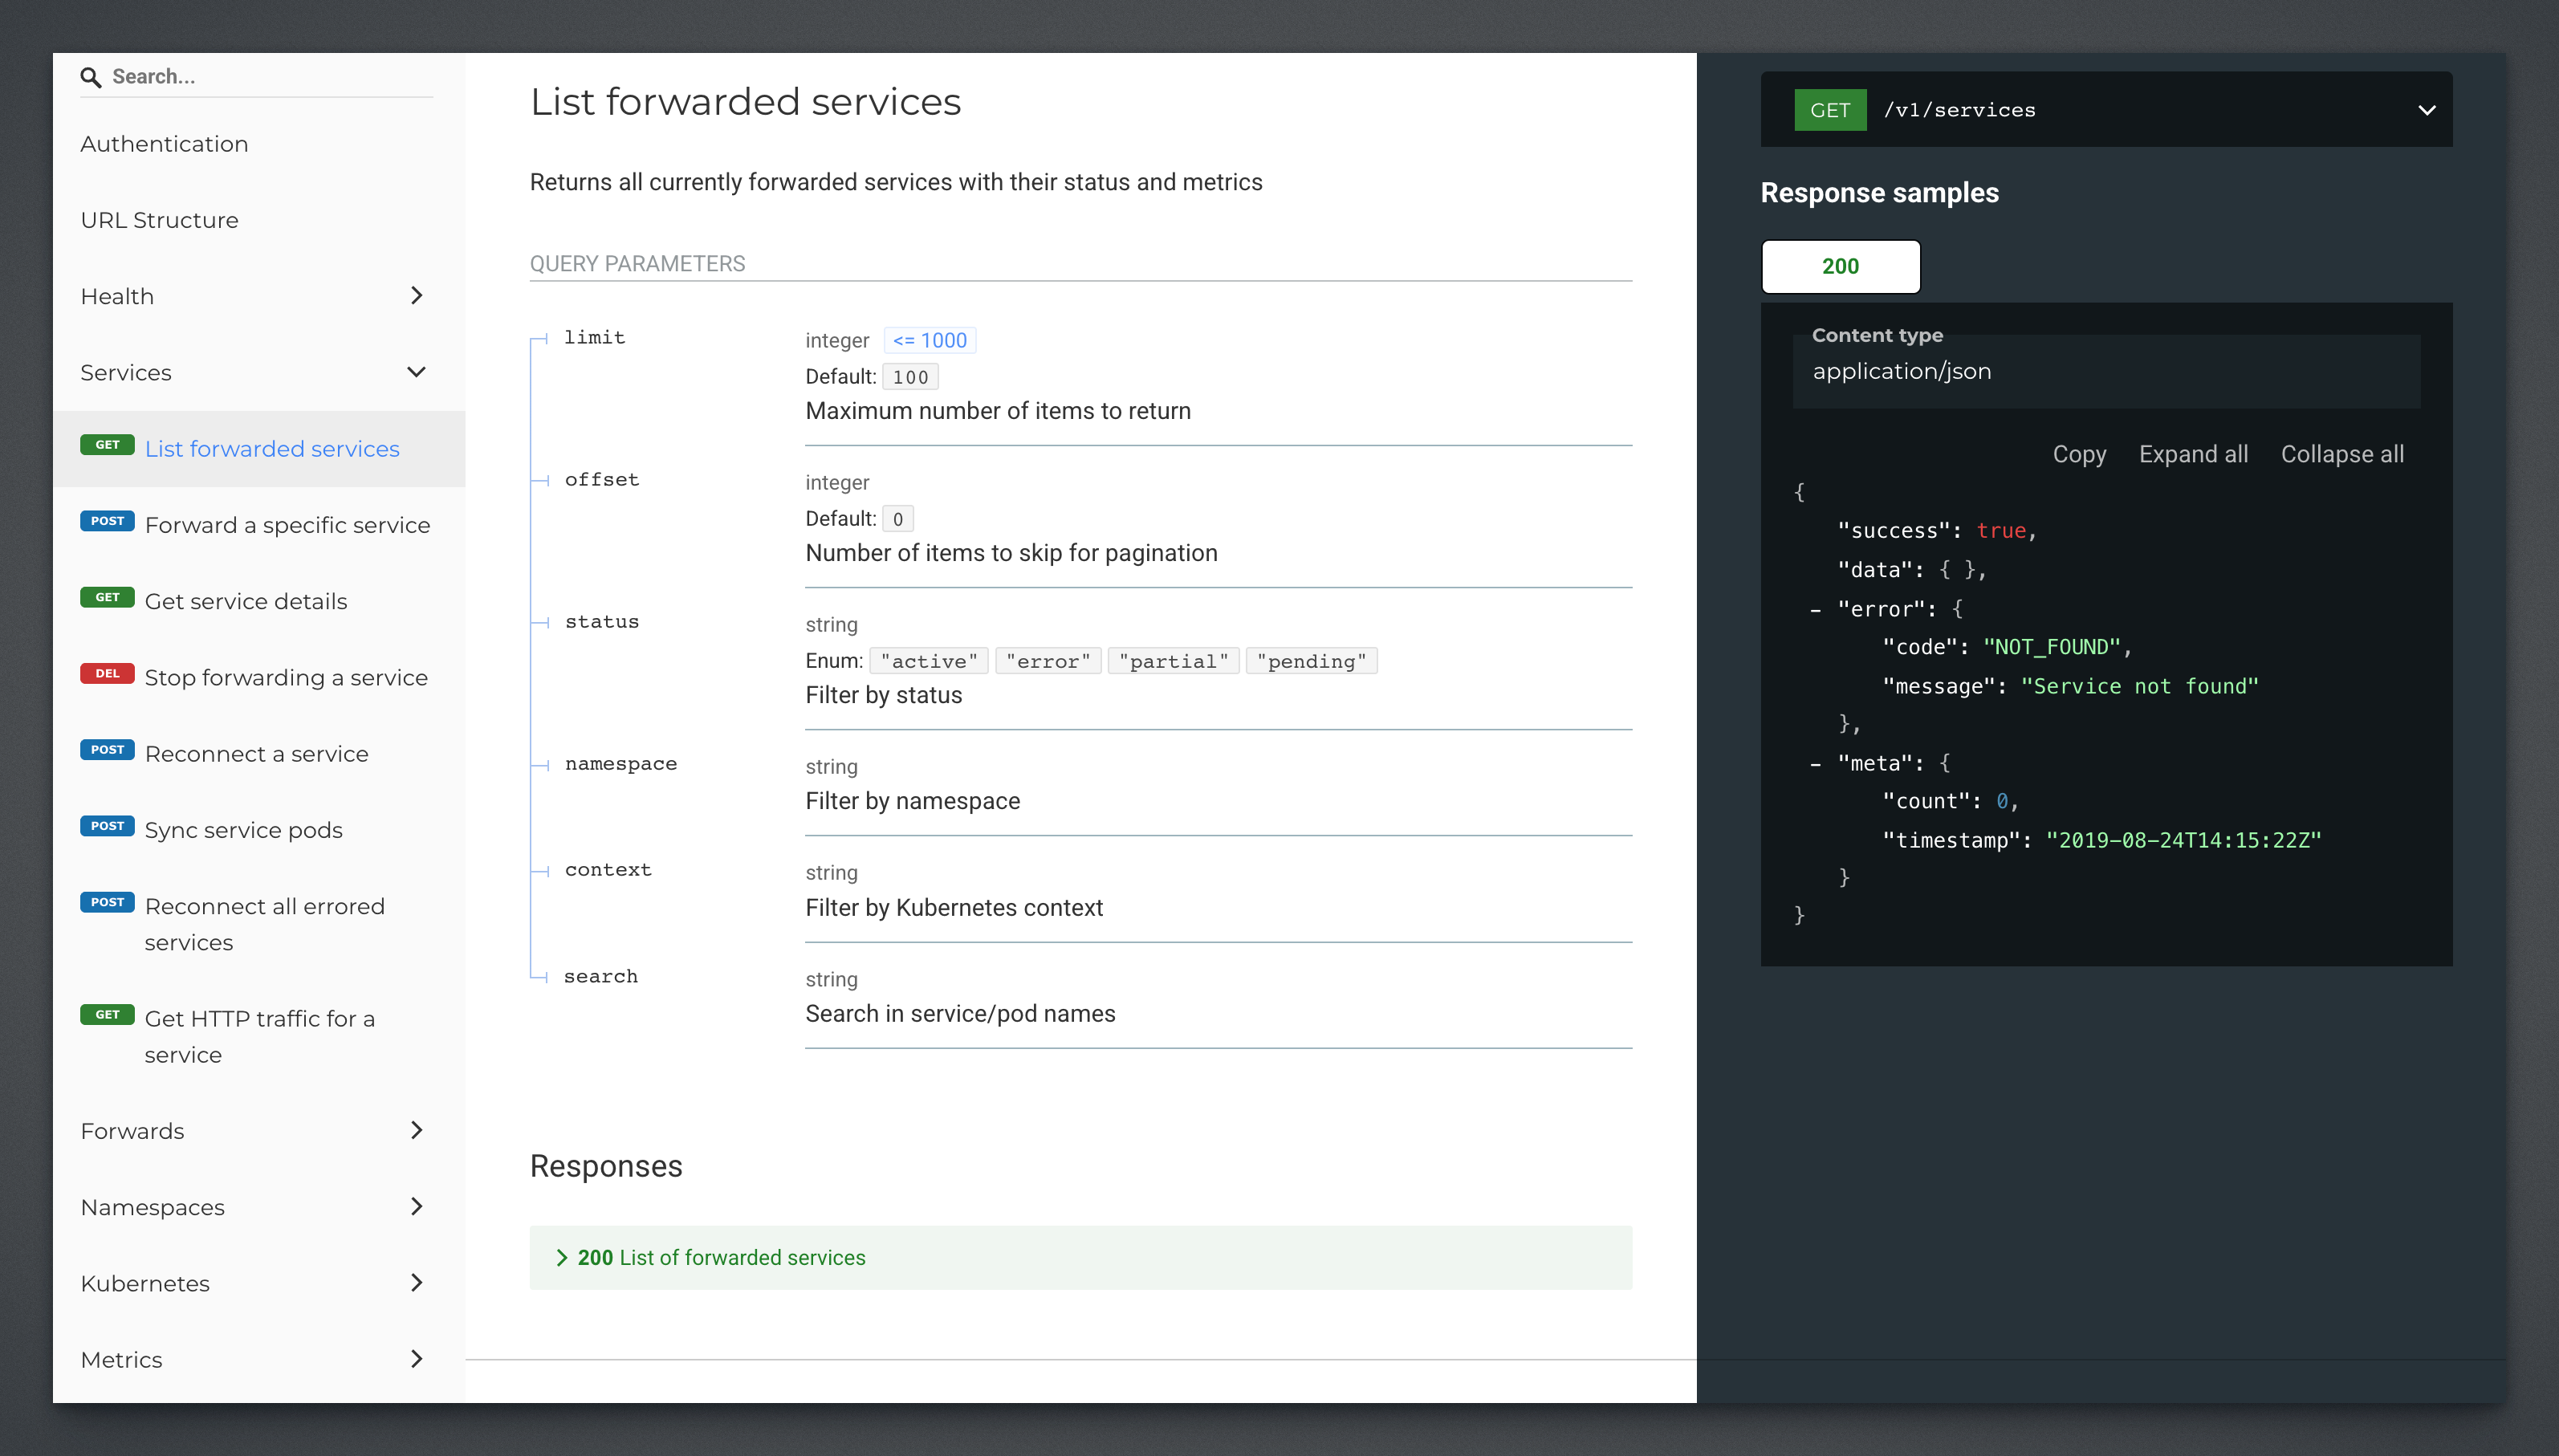
The interactive documentation provides a complete reference for all endpoints organized into nine categories: Health (status and version info), Services (manage forwarded services), Forwards (individual port forward details), Namespaces (add/remove namespace watchers), Kubernetes (discover namespaces, services, pods, events, and endpoints from your clusters), Metrics (traffic statistics and history), Diagnostics (troubleshoot network and error states), Events (real-time SSE streaming), and History (reconnection and error logs). Each endpoint shows query parameters, request format, and response schema with example JSON.
The REST API is the foundation for all programmatic interaction with kubefwd. It integrates with shell scripts, CI/CD pipelines, custom dashboards, and development automation tools. A pre-commit hook could verify required services are forwarded before running tests. A deployment script could dynamically forward services from a staging namespace during integration testing. The API makes kubefwd a building block for development workflows rather than just a standalone tool.
Installation
macOS (Homebrew)
brew install txn2/tap/kubefwd
To update:
brew update && brew upgrade txn2/tap/kubefwd
Linux
Download the latest release from the releases page.
Debian/Ubuntu (.deb)
# Install
sudo dpkg -i kubefwd_amd64.deb

# Update (download new .deb, then)
sudo dpkg -i kubefwd_amd64.deb
RHEL/Fedora (.rpm)
# Install
sudo rpm -i kubefwd_amd64.rpm

# Update
sudo rpm -U kubefwd_amd64.rpm
Manual installation (.tar.gz)
# Install
tar -xvzf kubefwd_Linux_amd64.tar.gz
sudo mv kubefwd /usr/local/bin/

# Update (download new tarball, then repeat the above)
Windows (Scoop)
scoop install kubefwd
To update:
scoop update kubefwd
Docker
docker run -it --rm --privileged \
  -v "$HOME/.kube:/root/.kube:ro" \
  txn2/kubefwd --tui
How It Works
kubefwd creates a unique loopback IP address for each service (e.g., 127.1.27.1, 127.1.27.2). This allows multiple services to use the same port without conflicts.
Your App → api-gateway:8080
         → /etc/hosts: api-gateway = 127.1.27.1
         → kubefwd listens on 127.1.27.1:8080
         → forwards to pod in Kubernetes cluster
The /etc/hosts modifications are temporary; kubefwd cleans them up on exit.
Requirements
- A valid
kubectlconfiguration with cluster access - Root/sudo access (see below)
- Kubernetes 1.19+ recommended
Why sudo? Unlike kubectl port-forward which binds to unprivileged high ports, kubefwd needs to modify /etc/hosts so services are accessible by their real hostnames, and bind to loopback addresses (127.x.x.x) for each service. Both operations require root privileges on Unix systems. Windows uses a similar elevated privilege model. kubefwd cleans up all /etc/hosts entries and network bindings when it exits.
Why kubefwd Instead of Telepresence?
This question comes up often. They solve different problems.
kubefwd forwards cluster services to your local machine. Your app connects to postgres:5432 or api:8080 as if those services were running locally. Traffic flows one direction: local to cluster.
Telepresence can do that too, but its main feature is traffic interception: routing requests destined for a cluster service to your local machine instead. This enables powerful workflows like debugging with real traffic patterns, preview URLs for code review, and testing how your local changes handle production-like requests.
Telepresence is popular for good reasons. It’s backed by Ambassador Labs with enterprise support, IDE integrations, and comprehensive documentation. It solves genuinely hard problems that kubefwd doesn’t attempt.
kubefwd is intentionally simpler. No cluster components to install, no configuration, no account signup. One binary, one command. If you just need to forward services to your local machine quickly, kubefwd does that with minimal friction. If you need traffic interception, preview URLs, or deeper cluster integration, Telepresence is the better choice.
AI Integration
kubefwd includes an MCP (Model Context Protocol) server that lets AI assistants like Claude Code manage port forwarding on your behalf. Your AI can discover cluster services, forward them as needed during development, and read pod logs to help debug issues. For setup instructions and examples, see AI-Assisted Kubernetes Development with kubefwd.
Resources
This blog post, titled: "kubefwd in 2026: Interactive TUI and Auto-Reconnect: The complete guide to kubefwd's new features" by Craig Johnston, is licensed under a Creative Commons Attribution 4.0 International License.
